Wallbox Pulsar Plus Product Support | Smart Home Charge
Image of Guide

You can unsubscribe at any time.

You are signing up to receive the Smart Home Charge newsletter. Terms and conditions apply.

Not quite ready for an installation yet?

Access our FREE guide to home charger installation.

Sign up and instantly get:
  • Your FREE and exclusive interactive Go Electric guide
  • The latest EV charger reviews
  • New car releases and EV news
  • App set-up guides and more electric car charging tips
Not quite ready for an installation yet?

Access our FREE guide to home charger installation.

Image of Guide
Sign up and instantly get:
  • Your FREE and exclusive interactive Go Electric guide
  • The latest EV charger reviews
  • New car releases and EV news
  • App set-up guides and more electric car charging tips

You can unsubscribe at any time.

You are signing up to receive the Smart Home Charge newsletter. Terms and conditions apply.

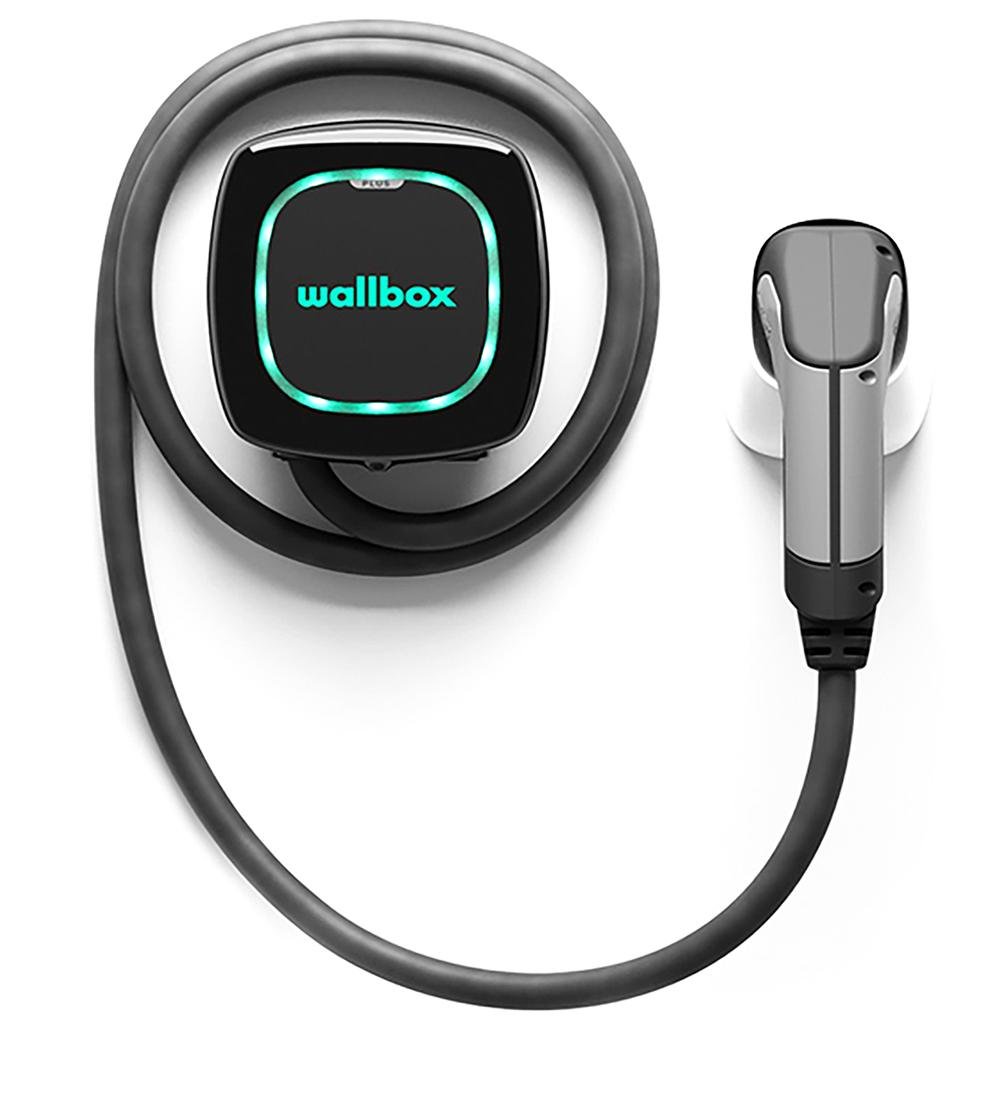
Get to know your Wallbox Pulsar Plus
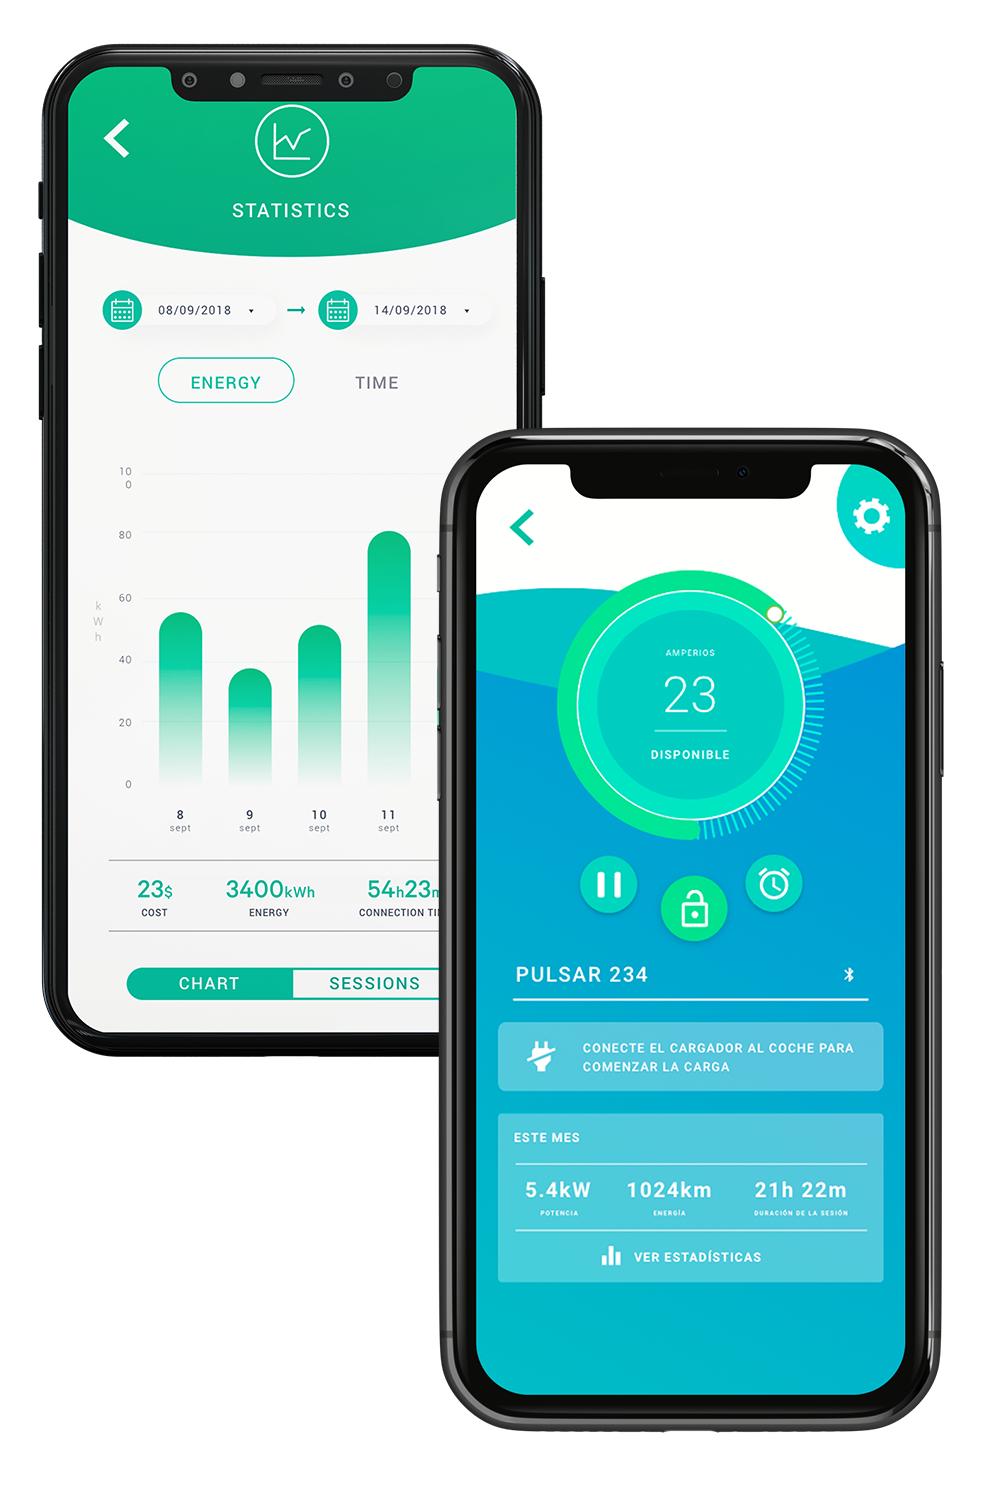
We've created this page to help you understand your EV charger so you can get the most out of it and deal with any potential hiccups along the way. Get started with these key features for your Wallbox Pulsar Plus.

Set up a schedule

+

The myWallbox app allows you to set pre-defined times for your EV to charge, making it more convenient, as well as potentially helping you to save money if you have an energy tariff with an off-peak rate.

You can follow the steps below or watch the video further down the page.

  1. Open the myWallbox app
  2. Select your charger
  3. Tap the clock icon (located next to the lock icon)
  4. Tap the days you want the schedule to be applied to.
  5. Enter the desired start time using the hour and minute wheels
  6. Enter the desired end time using the hour and minute wheels
  7. Tap accept to save the schedule

The myWallbox app currently allows you to save up to four different charge schedules all of which can be viewed and edited on the main dashboard.

Lock the Wallbox

+

The Wallbox Pulsar Plus comes with a locking feature that prevents others from using your charger. The lock feature, located within the app, can also be automated to lock and unlock during specific times of the day such as when you are at work.

How to manually lock and unlock the Wallbox Pulsar Plus

To manually lock or unlock the Wallbox Pulsar Plus, first:

  1. Open the myWallbox app
  2. Select your charger
  3. Tap the padlock icon located under the status circle. The padlock icon should "lock" and change to an amber colour
  4. The light ring around your Wallbox Pulsar Plus will also turn amber to symbolise it is locked
  5. To unlock the Pulsar Plus, simply tap the padlock icon again. The light ring around your Pulsar Plus should turn green again

How to manage the autolocking feature

When autolock is activated, the Wallbox Pulsar Plus will automatically lock for a specified period of time or after your charge session has ended. To activate autolock, you'll need to:

  1. Open your myWallbox app
  2. Select your charger
  3. Tap the settings icon located in the top right corner
  4. Tap "advanced options"
  5. Tap the toggle switch located next to where it says "protection by autolock" to turn autolock on and off
  6. You can also set an autolock timer by using the slider underneath the toggle to adjust the number of minutes you want the feature to activate after
  7. Tap save when finished.

While autolock is active, you will need to unlock the Wallbox Pulsar Plus via the app if you wish to charge your vehicle. 

Look out for firmware updates

+

To get the most out of your Wallbox Pulsar Plus, it is important to keep your charger's firmware up to date.

To check and update your Wallbox, first you need to:

  1. Open the myWallbox app
  2. Select your charger
  3. Tap on the settings icon located in the top right corner of the screen
  4. Tap "charger info"
  5. Tap "charger version"
  6. If the charger needs updating, there will be an option to install the latest update underneath the firmware number

What do the lights on the Wallbox Pulsar Plus represent?

+

The Wallbox Pulsar Plus displays various statuses via the LED light ring located on the front of the unit. Each colour and light cycle represents a different state which we will list below:

Green light circulating around the Wallbox logo: - Your Pulsar Plus is powering on and initialising

Solid green light: - Your Wallbox Pulsar Plus is powered on and ready to use

Solid turquoise:- Your vehicle is connected to your pulsar plus and communication between both has been established. While waiting to complete an action or start the charging process, the LED device remains in this position. This Turquoise LED color is also displayed when:

  • Your vehicle was in a charging session and is now fully charged
  • You have paused the charging process through the myWallbox app
  • Your vehicle is waiting for power assignation (Power boost error signaling).

Blinking turquoise:- This indicates that your Pulsar Plus has a charge schedule in place and is ready to start.

Slow blinking dark blue:- A secure connection between your charge point and your vehicle has been made and a charging session is in progress

Solid yellow:- Your Wallbox Pulsar Plus is locked

Solid red:- There is a fault with your charger. If your Wallbox Pulsar Plus is glowing this colour even after resetting then you will need to contact Wallbox

Solid White:- Your Wallbox Pulsar Plus is updating

Need to contact Wallbox?

+

You can get in touch with Wallbox by visiting the 'contact us' page and filling out your details on their form. Afterwhich, Wallbox will contact you directly via email or telephone.

You can also contact Wallbox via the app by logging into your account and on the main menu:

  1. Tap the account button (this is the icon in the top right-hand corner)
  2. Tap "help and support"
  3. On this screen you will have one of three options: report issue (via email), call Wallbox support centre, or visit the support section of their website
  4. Select from one of these options and follow the instructions on the screen

Charger isn't working? Try these steps first!

Most EV chargers are very reliable and should charge your vehicle as intended. However, there are lots of variables with EV charging that can occasionally interrupt this process. Make sure you've checked the below before moving on to the advanced troubleshooting steps further down the page, as there could be a simple solution to the problem.

Is the cable plugged in correctly?

+

As part of a safety and security mechanism, vehicles will often lock a plugged-in cable into place during a charge session in order to prevent forced unplugging. If the Wallbox cable is not properly inserted into your vehicle, the locking mechanism in the vehicle's charging port might not lock on to the cable properly and therefore prevent a successful charge.

If you think this might have happened to you, we advise that you unplug the cable from your vehicle and plug it back in again, hold it in place until you hear the locking mechanism on your vehicle grab the charging cable.

Is the vehicle charging rate not what you expected?

+

Most vehicles can accept a charge rate of up to a 7.4kW AC using a typical dedicated home charge point, while some can accept a higher rate (up to 22kW) if you have a three-phase charger and three-phase electrical supply at home, though this is rare in the UK.

However, some electric cars, such as the original Nissan Leaf, are limited to lower charging rate. For example, some vehicles are limited to 6.6kW or even 3.7kW which means no matter what charge speed your Wallbox Pulsar Plus outputs, your vehicle will only accept its own max limit.

This means your car may be charging "slower" than the 7.4kW advertised by the EV charging unit, but this is perfectly normal if your vehicle has its own charging limit.

You can check your vehicle's charge speed by finding it on our vehicle database. You should also be able to find your vehicle's max charge speed in its manual.

Check the vehicle's onboard charging settings

+

If you know your vehicle can accept the max charge speed offered by your Pulsar Plus, but it's still charging at a slower rate then it's worth checking the settings as some cars can manually limit charging speed as a menu option. We recommend you check your vehicle's settings to make sure that the limiter is either off or set to the max output of your Pulsar Plus.

Is your vehicle's settings clashing with your charger app schedule?

+

If you are finding your vehicle hasn't charged fully or at all after a charge schedule, it could be due to the vehicle itself. Some vehicles have built-in charge scheduling features which can interfere with and "contradict" the Wallbox Pulsar Plus' own charge schedule. Every vehicle is different, so we advise checking the manual that came with your vehicle if you are unsure how to turn off or modify its charge scheduling.

Has the charger tripped at the consumer unit?

+

It's rare, but an EV charger may trip at the consumer unit if it detects a fault . This is a safety feature, but simply switching the car charger back on at the consumer unit should get you up and running again.

If it keeps recurring then check the specific troubleshooting issues further down the page.

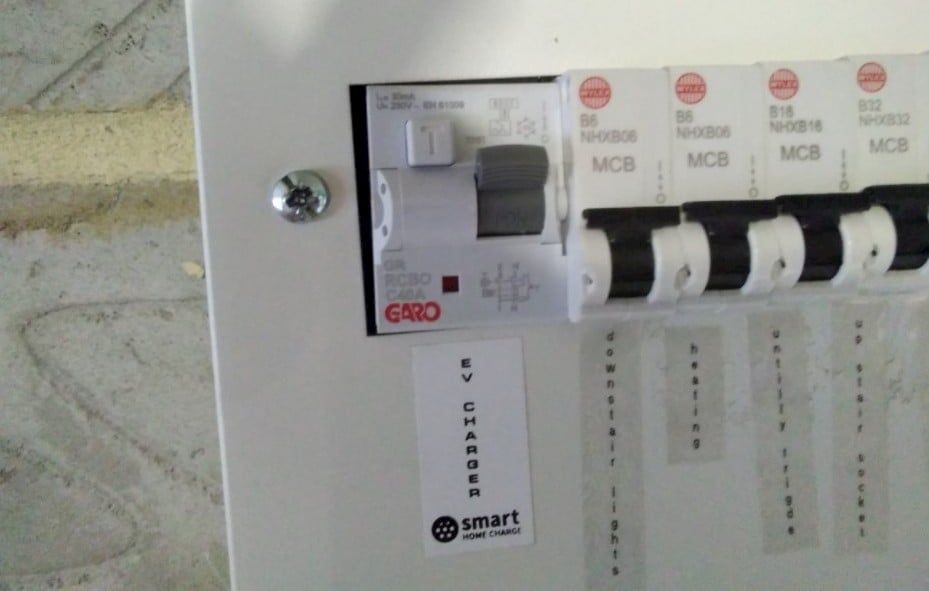
Reset the Wallbox Pulsar Plus

+

It’s a cliché, but it genuinely can work. Sometimes the Wallbox just needs a kick up the backside and the best way to do this is to reset it.

  1. Power down the Wallbox by switching it off at the mains
  2. Locate the dedicated circuit breaker (see photos below). This should be where your installer connected the charger’s cabling to your mains supply
  3. Switch it off and leave for 10 seconds
  4. Now switch it back on again

Wallbox Pulsar Plus Advanced Troubleshooting

There is a red ring on the Wallbox

+

This could be a fault with the unit or installation. Try the following:

  • Disconnect the charger from the vehicle and turn off the circuit breaker. Wait 10 seconds before turning it back on. If the red error light persists, turn the unit off again and contact Wallbox.
  • This can also be related to a firmware update. Check the firmware update instructions above to check if an update is available. Refer to the instructions at the top of this page on how to do this.
  • This could be related to an over-voltage issue from the electricity suppliers. This is a standard safety feature but if it persists contact Wallbox.

The vehicle did not charge fully

+

If the vehicle did not charge fully or to the expected amount, please check the following:

  • Do you have a schedule set? If you have a charging schedule set, this will physically limit the amount of time the vehicle will charge for and may not be enough to reach the charging percentage you expected. Try extending the charging schedule.
  • Is there a limit on the vehicle? Most vehicles allow you to set a charging limit to prevent them charging all the way to 100%. It’s generally recommended to not charge above 80-90% on a daily basis. Check if there’s a limit set on your vehicle.
  • Did the circuit breaker trip? Check the circuit breaker to see if it’s in the correct position. If it’s tripped then flip it back on. If the problem persists, please contact Wallbox.

My charging session did not start

+

There are many causes for this. There could be a fault with the software or unit, but check the following first:

  • Is the vehicle scheduled to charge at a later time?
  • Is the vehicle completely charged already?
  • Is the Wallbox locked? In the Wallbox app, there is a digital lock – check the device is unlocked for charging. The light on the charger should show green if it’s unlocked.
  • Does the vehicle itself have an error? Check the vehicle.
  • Is the charging plug connected properly? Unplug and reconnect the plug.
  • Is the charging plug dirty or damaged? This can prevent a good connection, so check it is in good condition.
  • Is there a schedule set on the vehicle itself? Some vehicles have scheduling features built in that can conflict with the charger’s own schedule. Please disable any schedules on the vehicle.

If you’ve checked the above and still experience charging session issues, then please contact Wallbox directly who can remotely diagnose the issue.

The vehicle is charging at low power

+

If the vehicle is charging at a lower rate or speed than expected, check the following:

  • Is the amp rate set to 32A in the Wallbox app? Check your Wallbox app – there is a dial where you can adjust the charging rate. Make sure the dial is “full”.
  • Is there a manual limit on the vehicle? Some vehicles allow you to set a charging rate limit, such as 16A. Check inside your vehicle and make sure the setting is at 32A. If you’re unsure where this is, please contact the dealer who can assist.
  • Is your vehicle limited to lower rates of charge? Some vehicles, especially plug-in hybrids, are automatically limited to lower rates of charge – for example, 3.6kW instead of 7.4kW. This means even if you have a 7.4kW charger, your vehicle will charge no faster than 3.6kW. Check our vehicle guides to see the rate for your vehicle or speak with your dealer.

If you’ve checked the above and the problem still persists, contact Wallbox.

The app does not connect via Bluetooth

+

The Wallbox can connect to the myWallbox smartphone app via Bluetooth. It has a range of 10 metres. If this is not working try the following:

  • Turn your phone Bluetooth off and on again to see if your phone will connect.
  • Make sure you’re within the 10-metre range of the Wallbox. Try moving a little closer or further away.

If this problem persists, please contact Wallbox who can investigate further.

The app does not connect to charger using WiFi

+

To ensure regular updates and a more stable connection, the Wallbox should be connected to your home WiFi.

If you’re experiencing issues, try the following:

  • Has the Wallbox been correctly paired to your home WiFi? Connect to your Wallbox via Bluetooth. Go into settings on the Wallbox app and try to reconnect to your home WiFi.
  • Is your internet working? WiFi can be inconsistent, so using another WiFi enabled device, check that you have a connection and that you can connect to the internet. It may be the internet in your home is down temporarily.
  • Try restarting your broadband router – you can usually switch it off on the back of the device or at the mains. Wait 10 seconds and turn it back on. Wait for the router to reset. Once ready, try connecting to the Wallbox again.

The problem with my unit is not listed on here or the advice given has not solved my issue

+

If none of the advice above works then you might need to contact Wallbox by visiting the 'contact us page on their website and filling out your details on their contact form.

You can also contact Wallbox via the app by logging into your account and on the main menu:

  1. tap the account button (this is the icon in the top right-hand corner)
  2. Tap "help and support"
  3. On this screen you will have one of three options: report issue (via email), call Wallbox support centre, or visit the support section of their website
  4. Select from one of these options and follow the instructions on the screen
Wallbox Pulsar Plus Installation and Setup Guidance for installers

Step 1: Check the charger

+

Customers should receive their Wallbox Pulsar Plus charger before installation day (if ordered via Smart Home Charge). It’s good to check the contents inside the box to make sure there isn’t any damage and to check the correct product has been sent.

Step 2: Download the app

+

Before installation, customers should download the myWallbox app from the smartphone app store. Click the links below to download the myWallbox app:

Step 3: Set up the app

+

1. Open the myWallbox app

2. Customers should create a myWallbox account. Follow the on-screen instructions.

3. Once registered, the customer will receive an email to confirm the account.

4. Open the email from Wallbox and click the “Confirm” button.

5. Return to the app and sign in with the correct username/email address and password.

Step 4: Initial setup and pairing

+

After installation, installers should pair the Wallbox Pulsar Plus with the myWallbox app to enable the full features available on the charger. Follow these instructions: 

  1. Make sure Bluetooth on the smartphone is turned on as this is required for initial pairing
  2. Open the myWallbox app and log in
  3. Click “I already have a charger”
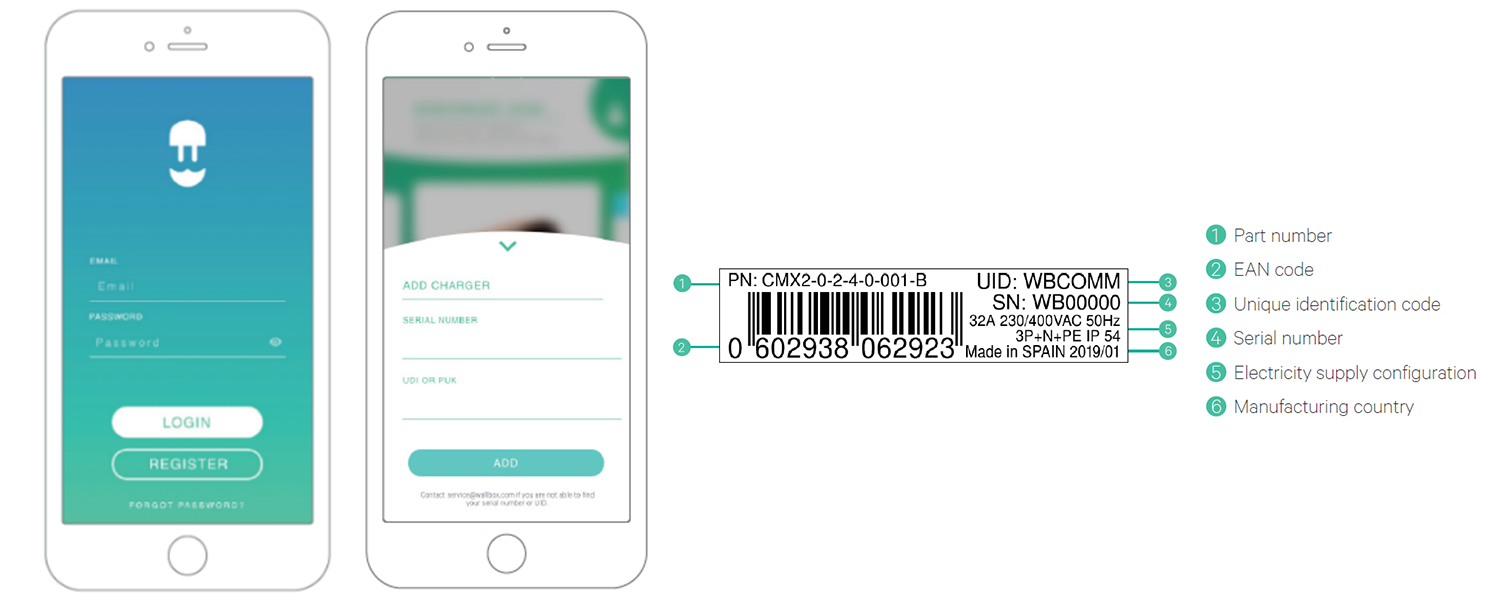
  4. You should see the “Add Charger” menu. Here you can enter the Serial Number and UID (identification number). You can find this information on the outside of the charger itself
  5. Click “Add” and the new Wallbox charger should now be available in the app
  6. You can now pair the Wallbox Pulsar Plus with the customer's home WiFi
  7. Enter the settings menu
  8. Select Connectivity
  9. Select WiFi and follow the on-screen instructions

Step 5: After installation

+

Once the installation is complete, installers should check the Pulsar Plus connects correctly to the app.

If you have followed the above instructions, then follow these steps:

  1. Turn on Bluetooth on your phone. The app should recognise it is connected to your Wallbox charger once it is turned on and nearby.
  2. If it does not, try standing closer to the Wallbox charger.
  3. The app should clearly show it is connected to your Wallbox, allowing you to set up schedules, monitor charging history and remote lock/unlock the Wallbox.

WATCH - how to set up a schedule for the Pulsar Plus

Watch our simple tutorial to choose the time you want to charge your electric car
Not ready for a home EV charger yet?
Still have questions?

Download our FREE Go Electric guide to home charger installation.

Description Here.
BE THE FIRST TO KNOW
Sign up and instantly get:
  • Your FREE and exclusive interactive Go Electric guide
  • The latest EV charger reviews
  • New car releases and EV news
  • App set-up guides and more electric car charging tips

You can unsubscribe at any time.

You are signing up to receive the Smart Home Charge newsletter. Terms and conditions apply.