- Electric car home charger installation /
- Product Support /
- Ohme Home Pro
You can unsubscribe at any time.
You are signing up to receive the Smart Home Charge newsletter. Terms and conditions apply.
Access our FREE guide to home charger installation.
- Your FREE and exclusive interactive Go Electric guide
- The latest EV charger reviews
- New car releases and EV news
- App set-up guides and more electric car charging tips
Access our FREE guide to home charger installation.
- Your FREE and exclusive interactive Go Electric guide
- The latest EV charger reviews
- New car releases and EV news
- App set-up guides and more electric car charging tips
You can unsubscribe at any time.
You are signing up to receive the Smart Home Charge newsletter. Terms and conditions apply.
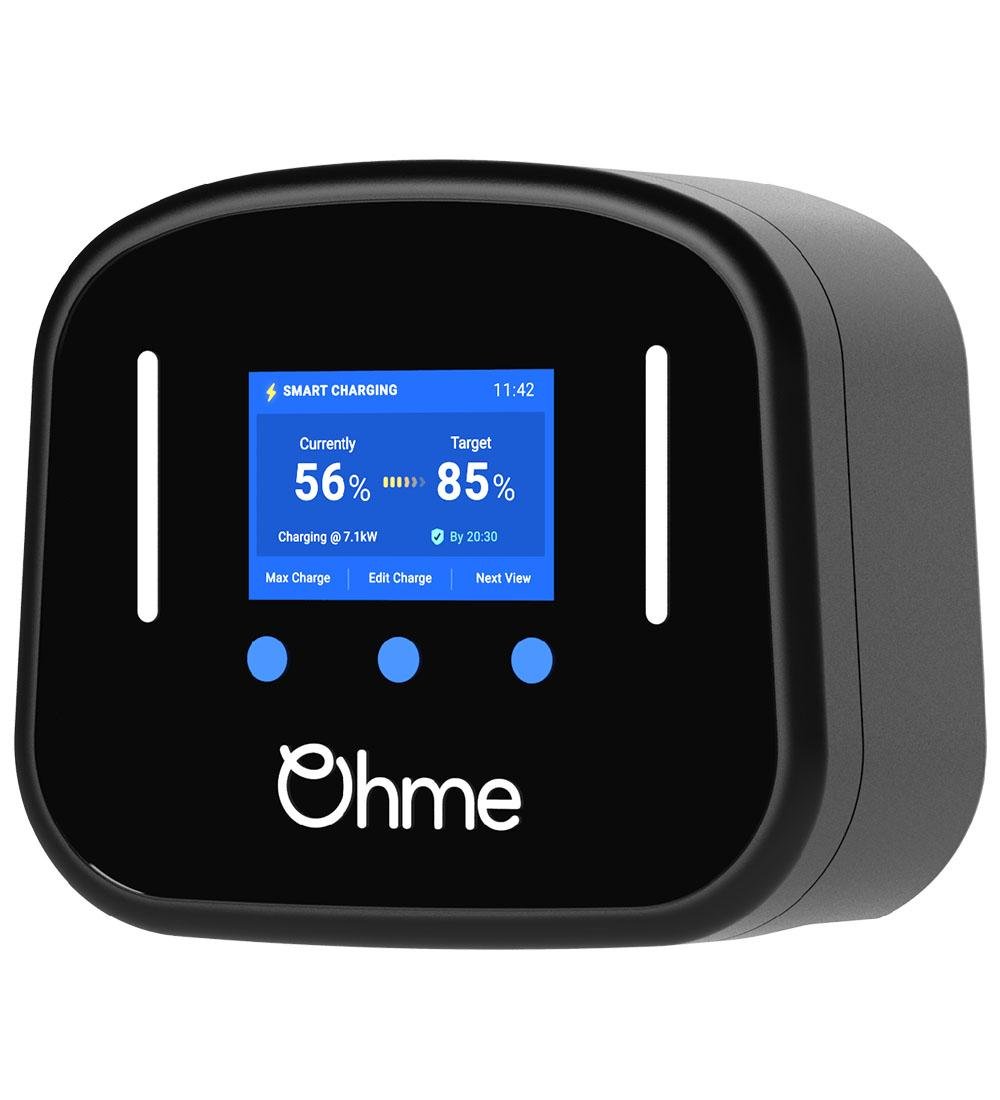
Get to know your Ohme Home Pro
Getting to know what’s on the screen
With the Ohme Home Pro, you can start a charge and edit a current charge session as well as review various statuses from the unit’s screen.
To get started, plug the cable into your vehicle and follow the instructions below depending on what you want to do.
Start a max charge session
Starting a max charging session will override any charge sessions currently active and charge a plugged-in vehicle until it is full.
To start a max charge from the Ohme Home Pro's screen, you will first need to make sure that your car is plugged in.
The Ohme Home Pro’s screen will then display the phrase “smart charging” or 'car connected' if it detects that a vehicle is connected.
Next, tap the blue button under 'max charge', after which the screen should turn red and your vehicle will begin charging.
If you need to stop a max charge session early, simply tap the blue button under 'stop charge'.
The screen will then go back to blue and the percentage of charge added during the charge schedule will be displayed.
If you would like the resume the max charge session, tap the blue button on the left under 'charge now'.
From this screen, you can also set a target charge by tapping the middle blue button.
To stop the max charge session completely, unplug your vehicle.
Edit a charge session
Tapping on 'edit charge' will allow you to make changes to the current charge schedule in place.
To edit the current charge session from the Ohme Home Pro’s screen you will first need to make sure that your car is plugged in; the Ohme Home Pro’s screen will display the phrase 'smart charging' or 'car connected' if it detects that a vehicle is plugged in.
Next, tap “edit charge” and edit the target percentage using the left button and middle button to adjust the number on the screen.
When you’re happy with your target percentage, tap 'next'.
On this screen, you will be given the option to change the time that you want your charge session to stop using the left and middle buttons to add or subtract in 30 minutes increments.
Tap 'done' when finished editing your target finish time.
Set up and edit a charge schedule
If you have a multi-rate energy tariff such as Intelligent Octopus or EDF Goelectric, setting up a charge schedule is one of the easiest ways that you can save money on car charging costs.
You can also set multiple schedules up to suit different scenarios if you like, but for now, try setting up your first schedule:
Open the Ohme app
Tap the menu option in the top left corner of the screen (the icon looks like three small solid lines)
Tap 'charge schedule'
Tap the blue circle with a plus inside located on the bottom corner of the screen
Name the schedule
Select the days that you want your charge schedule to be active on using the icons. You can also select the 'weekdays' or 'weekends' icons if you prefer.
Set a target range/battery percentage of 100 miles (or whatever you need each day) using the slider
Set a finish time, for the time that you need your vehicle to be charged by each morning.
Tap “Create” at the bottom to save your charge schedule.
Once done, your newly created charge schedule should appear in the charge schedule menu. Here you can edit a current charge schedule simply by tapping on it. You can also turn a schedule on and off using the toggle switch located on the right side of the schedule.
To add another charge schedule, simply repeat the process above.
Adding your energy tariff
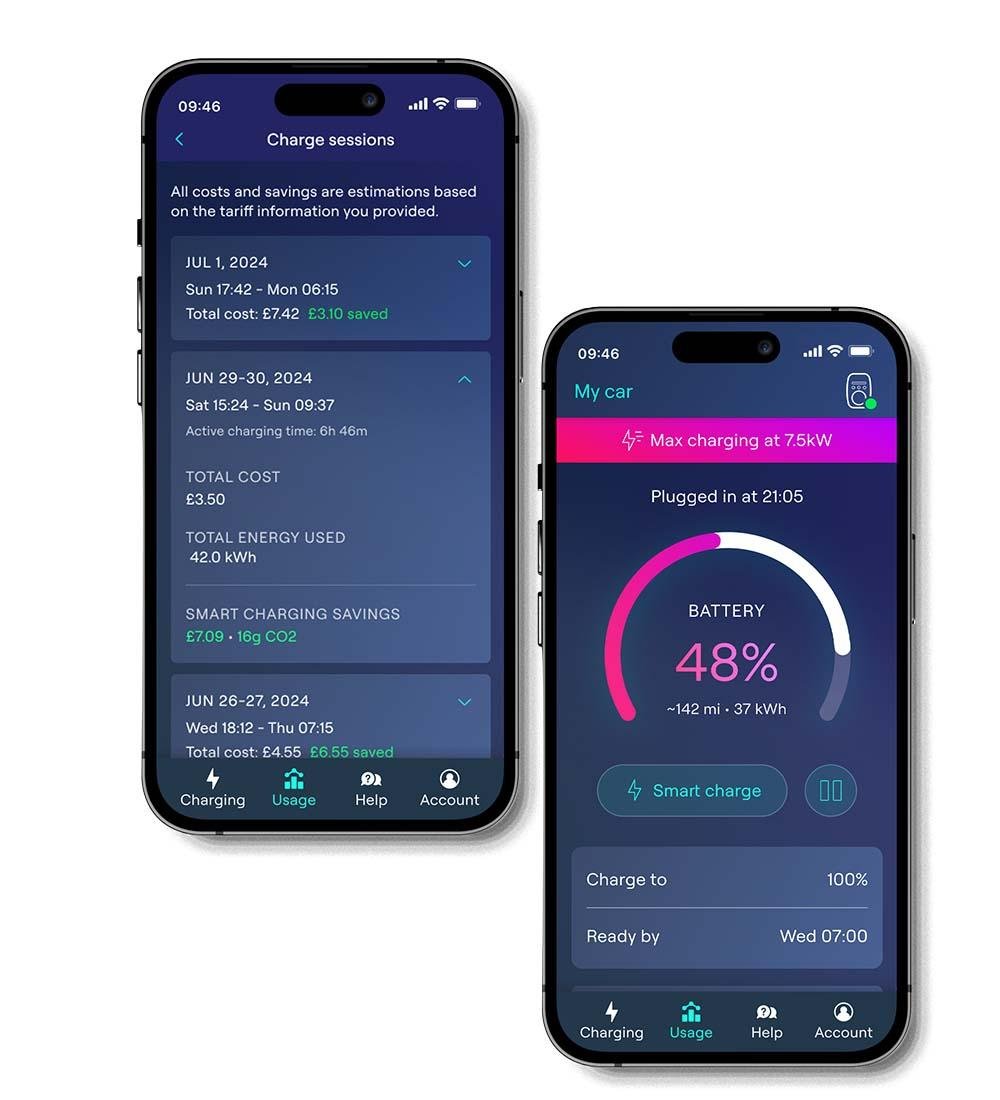
The Ohme Home Pro can communicate with your energy provider and charge your vehicle according to your energy tariff’s off-peak rate (if you have a multi-rate tariff). Doing this also allows you to see how much each charge session costs as well as what type of energy has gone into your vehicle (i.e. renewable or non-renewable).
To add your energy provider and tariff you will need to:
Open the Ohme App
Tap the menu button
Select the “tariff” option (If you have successfully paired the tariff to your app this will option will show “Tariff: Your Tariff”)
Choose the supplier you are currently with.
Enter your postcode.
Some suppliers offer multiple tariffs and if yours is one of them then you’ll need to select the tariff you are currently with (If your tariff doesn’t appear on the list then please see the solution in the troubleshooting section).
After confirmation, set the “never charge above rate” to the price you want your charger to be limited to if you want to do so.
Setting a price cap
If you have a multi-rate energy tariff and would like your Ohme Pro to only charge during your off-peak hours, regardless of your target range, then there’s an easy way to do this. Follow these steps:
Tap the menu in the top left corner of the app
Select the option “charge schedule”
Tap the cog in the top right hand corner
Tap the ‘limit charging over a certain cost’ toggle icon
In the ‘cost’ box, enter the price rate that you would like your Ohme Home to stop charging at.
Tap save changes.
Remember: if you select this option it will override your charging schedule and Ohme will stop charging once your electricity rate goes above this price. Therefore it may not meet your desired target range. Keep this in mind if you have a long journey planned as you may need to disable this setting. The Ohme app will alert you if it cannot reach the amount of miles you want.
Adding your vehicle to your Ohme Profile
In order to provide accurate data on your charging sessions, Ohme recommends that you add your vehicle make and model to your account.
This is because Ohme can communicate with some vehicles using an API (Application Programming Interface), which is a system that allows the charger to access information such as the vehicle’s state of charge (SOC) and battery level. Sadly, only a handful of manufactures disclose their vehicle’s API information. These manufacturers are:
- Audi
- BMW
- Cupra
- Hyundai
- Land Rover
- Kia
- Mini
- Nissan
- Renault
- Skoda
- Tesla
- Volkswagen
- Volvo
If you don’t have a vehicle from a manufacturer that discloses their vehicle’s API then fear not, you’ll still be able to access many of the features that the Ohme Home has to offer but they might require a few additional steps.
For example, say if you want to charge your vehicle to 80% of its battery after your commute to and from work. You’ll need to look at how much charge you have leftover after your commute and adjust your charge schedule so that it adds the percentage needed to reach the target.
Adding your vehicle from a manufacturer that shares their API information
- Tap the menu button in your Ohme App.
- Tap the “settings” option
- Tap “change car”
- Select your vehicle's manufacturer.
- If you have an online account with your vehicle’s manufacturer, tap account sign in, and enter your credentials. Skip to step 8
- If you don’t have an online account with your manufacturer, tap connect without an account.
- Select your vehicle’s model
- Tap 'done' on the confirmation screen.
Adding your vehicle from a manufacturer that doesn’t share their API information
- Tap the menu button in your Ohme App.
- Tap the “settings” option
- Tap “change car”
- Select the “other” option at the bottom right corner
- Select your vehicle’s manufacturer and tap either "account sign in" if you have an account with your vehicle's manufacturer or "connect without an account" if you don't
- Choose the model of your vehicle (Pay attention to the battery capacity and kW input. For example, if you have a 2011 24kWh Nissan leaf with a 3.3kW charger onboard select “Leaf 24kWh / 3.3kW 2011”)
- Tap 'done' on the confirmation screen.
Video Tutorials
Ohme have a bunch of videos on their app-tutorials page that show you how to use the front buttons on the Ohme Home Pro unit as well as the accompanying app.
Need to contact Ohme?
Please visit their "Contact Us" page to get in touch with Ohme directly
You can also visit their resources page for additional helpful troubleshooting tips and advice.
Setting up your Ohme charger with Intelligent Octopus
If you have an Ohme charger and are an Octopus energy customer, you will automatically be eligible for Intelligent Octopus.
To link your intelligent Octopus tariff with your Ohme account you will need to:
Open your Octopus energy app and tap the Get started button
Tap chargers when asked to select the device you want to connect to
Select the model of charger you have installed and the car that you will be charging with it.
When prompted, enter your Ohme account details into the email address and password boxes
Tap confirm when asked to confirm authentication.
You will then be taken back to the Octopus Energy app. Oh there, you will need to tap 'test connection'
Once the integration has been completed, you will see a new tab appear in the Octopus energy app called devices.
If you're Ohme account has been paired successfully, this page will instruct you to open the Ohme app to control and schedule charges.
On the Ohme app, you will notice that the tariff section has been updated to intelligent Octopus automatically and there will be an Intelligent Octopus schedule in the schedules section.
Charger isn't working? Try these steps first!
Is there power to the unit?
The best way to tell if the Ohme Home Pro is receiving power is by checking if the screen on the front of the unit is on and displaying information. If the screen is black, then this could mean that there is no current reaching the unit. If you are finding that this happening to your Ohme Home, then we advise that you check that the circuit breaker to your unit isn't off or tripped.
If the circuit breaker is set to the on position but your charger still does not power on, please contact Ohme via:
Email: [email protected]
Tel: +44 (0) 20 3375 1586
Can you charge your car at all?
If you have not paired your Ohme Home Pro with your Ohme app, the unit will act as a 'dumb charger' and should start charging your unit straight away.
If you have paired your Ohme app with your Ohme Home Pro, you should be able to go onto the main screen of your Ohme app to find out if your unit has recognised the vehicle you have plugged into it. The screen on the front of the unit should also display the phrase “smart charging” or “car connected” if it detects that a car is plugged-in. If both of the above are occurring when you plug in your vehicle, you should be able to tell the Ohme Home Pro to start charging or obey your charge schedules via the app or the unit’s screen.
If you can't do any of the above or your vehicle doesn't start charging after you have confirmed that you want to start a charge session then it means that there could be a fault with the unit and you will need to contact Ohme the support section of their website or by using the contact details in the drop-down above.
Have you tried resetting the unit?
Now we may be sounding like your local PC repair helpline when saying this but, have you tried turning it off and on again? Sometimes all the charger needs is a good old-fashioned reset (Also known as ‘power cycling’ in the EV world), below is how you do it.
Locate the circuit breaker that your charger has been connected to, this can either be found within your main consumer unit or installed as a separate switch.
Once you have found the switch, pull it down to the off position for 10 seconds. This will allow any residual charge to drain away and the charger to power down completely.
After waiting 10 seconds, push the switch back up to the “on” position and wait for the charger to power back on.
If a successful connection has been established, the Ohme screen should begin powering on.
Update the app
The Ohme app should be keeping itself up to date with the latest firmware automatically, but it’s always worth checking to see if the app is up to date via the app store on the iPhone or the Google Play on Android.
It goes without saying, if your problem is that your Ohme is not connecting to mobile data (You can check this by looking at the signal strength indicator located in the top right of the LED screen on the front of the unit) then that is a separate issue that needs fixing.
Ohme Home Pro Advanced Troubleshooting
My Ohme Home Pro acts as a “dumb charger” and charges my vehicle as soon as I plug it in rather than waiting for the set off-peak times or charge schedules.
First things first, make sure that you have added your energy tariff and set a charge schedule with a price cap. If you're unsure of how to do this then please see the advice above.
If you have done the above and the issue persists then the next thing you will want to check is your charger’s network connection. To do this, first tap the button labelled “info” on the main menu of your Ohme Home Pro’s screen and check for a signal strength indicator.
If you are not seeing a mobile signal strength indicator or the unit’s screen is displaying a network connection error even after resetting the charger then this could be the result of a faulty unit and you will need to contact Ohme regarding the issue.
The Ohme Home Pro and Ohme app won’t display my vehicle’s state of charge
When it comes to the Ohme Home Pro, some features on the app work better with some vehicles than others. This is because Ohme communicates with vehicles using an API (Application Programming Interface), which is a system that allows the charger to access information such as the vehicle’s state of charge (SOC) and battery level. Sadly, only a handful of manufacturers disclose their vehicle’s API information. These manufacturers are:
Audi
BMW
Cupra
Hyundai
Jaguar
Land Rover
Kia
Mini
Nissan
Renault
Skoda
Tesla
Volkswagen
Volvo
If you have a vehicle manufactured by one of the brands above then you’re in luck! Once set up, you’ll be able to do things like set charge schedules that charge your EV to a specific percentage. You will also see your vehicle’s battery percentage on the Ohme Pro’s screen when it’s connected.
If your vehicle manufacturer doesn’t share their API then the battery percentage indicator on the screen of the Ohme Pro that appears when a vehicle is plugged in will always stay at 0%.
My energy tariff isn’t listed in the tariff options
Ohme takes most energy providers into account when it comes to setting up the price cap on your charger, however, there is always a chance that your provider isn’t listed, especially if they are one of the less well-known providers. If you don’t see your tariff listed then you’ll need to enter your details manually. To do this:
Select the tariff option in the menu bar.
Scroll down to the bottom until you see the “Create new tariff” option
Select either “Fixed price tariff” or “Variable price tariff” depending on your tariff type
Variable tariffs
Enter the start and end of your off-peak hours (This timespan can be found on your electricity bill. If it isn’t, contact your provider).
Enter the price per kilowatt (p/kWh) of your off-peak hours (Again this can be found on your electricity bill or by contacting your provider)
Enter the price per kilowatt (p/kWh) you pay at all other times outside of your off-peak hours and press continue.
Chose your time zone and select if your meter runs on daylight savings (If you are unsure if your meter does or not, please contact your provider). After this, tap continue
Enter the name of your tariff (i.e. EDF GoElectric) and tap save.
Fixed Tariffs
Enter the price per kilowatt-hour that your provider charges (this can be found either on your energy bill or by contacting your provider) and tap continue
Enter the time zone you are in and select if your meter runs on daylight savings (If you are unsure if your meter does or not, please contact your provider). Once done, tap continue.
Enter the name of your tariff (i.e. EDF GoElectric) and tap save.
After entering your variable or fixed tariff, you should get a confirmation screen appear telling you that your tariff has been set up successfully. After you’ve tapped “okay” on the confirmation screen, you’ll be greeted with the options to edit or change your tariff.
I’m getting error messages telling me that my car is charging lower than expected
There are a few reasons as to why this can happen:
Firstly, some cars can limit the level of charge they take in. If you have this feature enabled and the limit is set to lower than the level of charge your Ohme Home Pro is outputting then you will receive an error message on your Ohme app. To fix this, you’ll need to go into your vehicle’s charge settings (Each manufacturer does this differently so if in doubt, check your owners manual) and either turn the limit off or set it so that the charge limit matches the Ohme Home Pro’s charge output (7.4kW).
Another reason why this problem can occur is because you might have selected a vehicle model on the app that has a higher charging capacity than the vehicle you own. For example, if you have a 2014 Nissan Leaf with a 3.3kw charger onboard and you select the version of the Leaf with the optional 6.6kw charger onboard. With the charger thinking you have a higher charger capacity on your vehicle than your vehicle actually has, the Ohme Home Pro will base its charge schedule calculations on that higher charge output which triggers an error message when it can't reach that charge capacity.
To fix this, you’ll need to:
If the manufacturer shares their API information
Tap the menu button in your Ohme App.
Tap the “settings” option
Tap “change car”
Select your vehicle's manufacturer.
If you have an online account with your vehicle’s manufacturer, tap account sign in, and enter your credentials. Skip to step 8
If you don’t have an online account with your manufacturer, tap connect without account.
Select your vehicle’s model
Tap done on the confirmation screen.
If the manufacturer doesn’t share their API information
Tap the menu button in your Ohme App.
Tap the “settings” option
Tap “change car”
Select the “other” option at the bottom right corner
Select your vehicle’s manufacturer and tap either "account sign in" if you have an account with your vehicle's manufacturer or "connect without account" if you don't
Choose the model of your vehicle (Pay attention to the battery capacity and kW input. For example, if you have a 2011 24kWh Nissan leaf with a 3.3kW charger onboard select “Leaf 24kWh / 3.3kW 2011”)
Tap done on the confirmation screen.
The problem with my unit is not listed on here or the advice given has not solved my issue
If none of the advice below works then you might need to contact Ohme by via:
Email: [email protected]
Telephone: +44 (0) 20 3375 1586
You can also visit their resources page by clicking here.
The language on my Ohme Home Pro screen keeps reverting to German
To fix this issue, you will need to:
- unplug your car if it's connected
- On the Home screen, press the left button to get the info page
- Press the middle button to change back to English
Check the charger
Customers should receive their Ohme Home Pro charger before installation day (if ordered via Smart Home Charge). It’s good to check the contents inside the box to make sure there isn’t any damage and to check the correct product has been sent.
Download the app
Before installation, customers should download the Ohme app from the smartphone app store. Click the links below to download the Ohme app:
You can also use your QR code sheet and request that the customer points their phone’s camera at the respective QR code to download the appropriate app.
Set up the app and pairing your charge point
After installation, installers should pair the Ohme Home Pro with the Ohme app to enable the full features available on the charger. Follow these instructions:
Open the Ohme app and select “Create Account”
Choose a sign-in method and enter the customer's details
Click Continue and select “Ohme Cable” as the product product
Scan the QR code found on the underside of the Ohme Home Pro charger (alternatively you can manually enter the letters and numbers underneath the QR code)
Select the customer's vehicle make and model (this is so that Ohme knows the battery size of the car etc)
Sign into the customer's vehicle account if applicable. For cars like the Tesla this is crucial, so make sure you sign in if the customer has an account with the car manufacturer.
Select the customer's energy tariff – this is important if the customer wants their Ohme Home Pro to automatically charge at the cheapest rates. If the customer's tariff is not listed, you can use the “Create your own tariff” option by inputting the times and rates that apply to the customer's home.
Choose the tariff from the list provided.