Easee One Product Support | Smart Home Charge
Image of Guide

You can unsubscribe at any time.

You are signing up to receive the Smart Home Charge newsletter. Terms and conditions apply.

Not quite ready for an installation yet?

Access our FREE guide to home charger installation.

Sign up and instantly get:
  • Your FREE and exclusive interactive Go Electric guide
  • The latest EV charger reviews
  • New car releases and EV news
  • App set-up guides and more electric car charging tips
Not quite ready for an installation yet?

Access our FREE guide to home charger installation.

Image of Guide
Sign up and instantly get:
  • Your FREE and exclusive interactive Go Electric guide
  • The latest EV charger reviews
  • New car releases and EV news
  • App set-up guides and more electric car charging tips

You can unsubscribe at any time.

You are signing up to receive the Smart Home Charge newsletter. Terms and conditions apply.

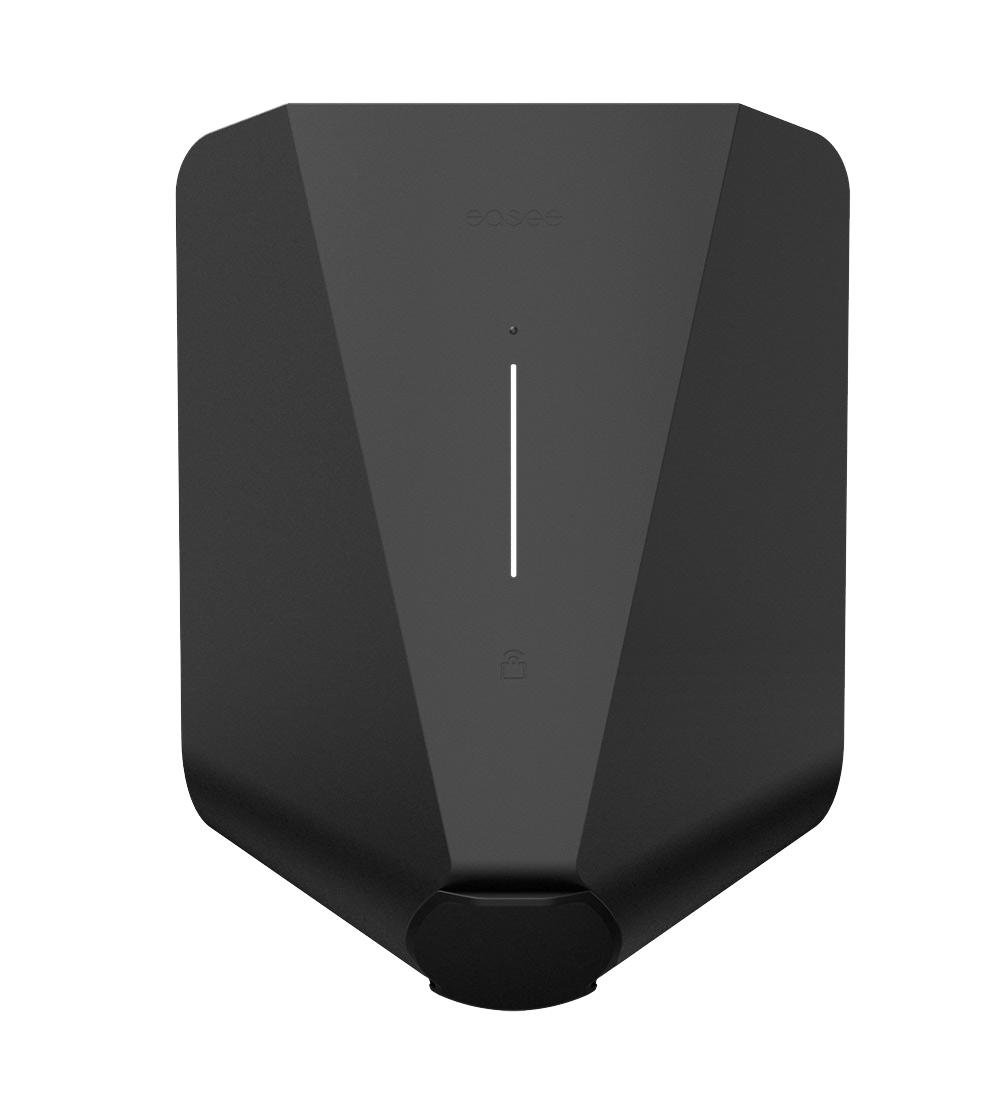
Get to know your Easee One
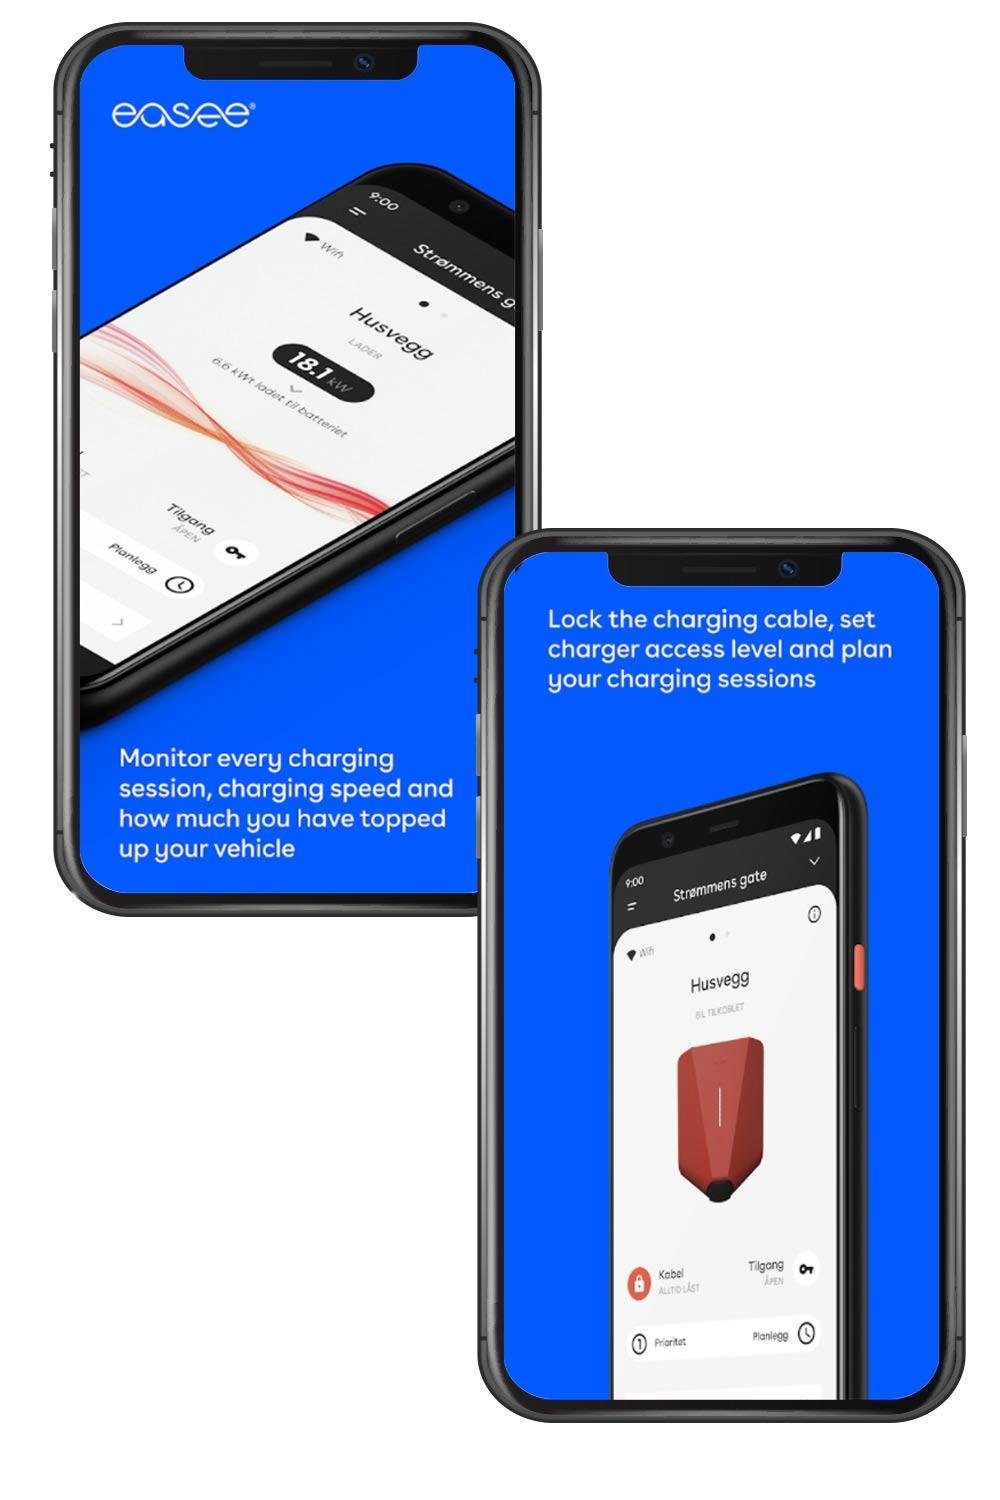
We've created this guide to help you understand your Easee EV charger so you can get the most out of it and deal with any potential hiccups along the way. Get started with these key features for your Easee One.

Set up a schedule

+

Easee chargers have two ways of scheduling charges, both of which are controlled via Eassee's dedicated app:

  • Delayed Start

  • Week Plan


Delayed Start

A delayed start schedule will run once then revert back to either non-scheduled charging or your set weekly schedule.

To program a delayed start on your Easee, you will need to:

  1. Tap “schedule” and make sure the schedule toggle switch is in the "on" position

  2. Tap “delayed start”

  3. Tap “time”

  4. Set the time you want your Easee to start charging using the hour and minute dial

  5. Hit save when finished

Your Easee will now start charging a plugged-in EV until the car is either full or reached its charge limit.

If you want to stop a delayed start schedule, you will need to tap the pause button on the main screen of the app.


Week Plan

This option allows you to set up to two schedules per day for each day of the week.

Your Easee will charge a vehicle as soon as its plugged-in on days that have no schedules when using this option.

To set a weekly plan:

  1. Tap “Schedule” and make sure the schedule toggle switch is in the "on" position

  2. Tap the “week plan” option

  3. Tap the day(s) of the week that you would like to set a schedule on

  4. Set the start and stop time. Tap the plus sign to add a second schedule to the selected days.

  5. Repeat the previous two steps if you want to set different schedules on the days you haven't selected.

  6. Tap save when finished

If you want to end your charge session early, you will need to go into the Easee app and tap the pause button on the main menu.

Locking the cable

+

Easee chargers can be switch between being a tethered and untethered unit.

All Easee chargers are in untethered mode (Also known as ‘Unlocked/locked’ mode) by default meaning that the cable can be detached from the unit when it’s not being used to charge a vehicle.

To switch your Easee to tethered mode (Also known as ‘Always Locked’ mode), meaning that the unit will lock the charging cable in place even when its not recharging a vehicle:

  1. Plug your charging cable into your Easee

  2. Tap the cable option in your Easee app

  3. Select the ‘Always Locked’ option

Your Easee will now permanently lock the cable into its charging port until you set the cable lock option back to 'unlocked/locked' mode.

What the different colours on the light strip mean

+

Easee chargers show their current status using a light strip located on the front of the unit.

Below is what each colour means:

  • white light at the bottom of the strip: The Easee is in standby mode

  • Strip fully lit in white: The Easee has recognised a connected car

  • Strip pulsating blue/white: Charging in progress

  • Strip flashing white: Your Easee is waiting for authentication

  • Strip fully lit in Blue: Your Easee is following a charge schedule

  • Flashing yellow at the bottom of the strip: Your Easee is waiting to be configured. Please see the troubleshooting section.

Need to contact Easee?

+

If you need to contact Easee you can do so by visiting the 'user support' page on their website and filling out your details on their contact form.

Easee will then contact you directly via phone or email.

How to I swap the Easee's font cover for a new one?

+

To remove the Easee One/Charge's front cover, you will need to:

  1. Turn the power supply to your charger off at the fuse board (Your installer should have marked this with a Smart Home Charge sticker)

  2. Behind the charging port flap is a cover that protects the Easee's locking screw, bend this down to reveal the screw

  3. Remove the screw using a screwdriver

  4. Insert the two prongs of the included tool into the two holes located either side of the screw hole, lightly squeeze the tool and pull down until the front cover comes loose

  5. Pull the front cover away from the Easee

When all of the above is done, take the new front cover and push it onto the body of the Easee until you hear it click into place, rescrew the locking screw and cover it with the screw cover.

Charger isn't working? Try these steps first!

Most EV chargers are very reliable and should charge your vehicle as intended. However, there are lots of variables with EV charging that can occasionally interrupt this process. Make sure you've checked the below before moving on to the advanced troubleshooting steps further down the page, as there could be a simple solution to the problem.

Is the cable plugged in correctly?

+

As part of a safety and security mechanism, vehicles will often lock a plugged-in cable into place during a charge session in order to prevent accidental or forced unplugging.

If the Easee cable is not properly inserted into your car, the locking mechanism in the vehicle's charging port might not lock onto the cable properly and therefore prevent the Easee from charging the car.

If you think this might have happened to you, you will need to unplug the cable from your EV, plug it back in again and hold it in place until you hear the locking mechanism on your EV grab the charging cable.

Like your vehicle, the Easee also has a locking mechanism in it’s cable port which locks your cable in place during charge sessions and permanently if you have your Easee in 'always locked' mode.

If you choose to have your Easee in ‘locked/unlocked’ mode, we advise that you check that the cable is properly inserted into the cable port of your Easee as well as your vehicle before starting a charge session.

If you're having trouble taking the cable out of your Easee, please scroll down to the troubleshooting section.

What charging rate can your EV accept?

+

Most EVs can accept an AC charge rate of up to 7.4kW using a single phase charger and up to 11kW when using a 3-phase charger.

Some older EVs however, such as the first Nissan Leaf, charge at a much slower rate and will limit your Easee's charge speed to its max rate.

You can check your vehicle's charge speed by finding it on the vehicle page section of our website (it will be listed under charging time).

You should also be able to find your vehicle's max charge speed in its handbook.

Check the vehicle's onboard charging settings

+

Some electric cars charge speed can be adjusted manually which when set will limit the charge rate that your Easee outputs to your vehicle.

If you think this is happening to you, please check your vehicle's settings to make sure that the limiter is either off or set to the max output of your Easee.

 Is your vehicle's settings clashing with your charger's schedule?

+

Some vehicles have built-in charge scheduling features which can interfere with your Easee One’s own charge scheduling.

Every EV is different, so we advise checking the manual that came with your EV if you are unsure how to turn off or modify its built-in charge scheduling.

Has your Easee tripped at the consumer unit?
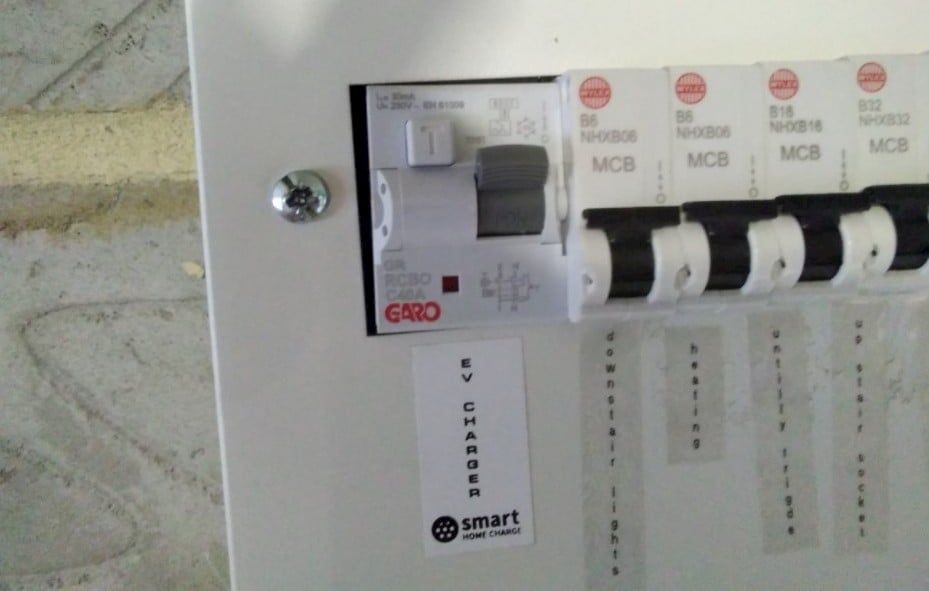
+

It's rare, but an EV charger may trip at the consumer unit if it detects a fault .

This is a safety feature, but simply switching the Easee back on at the consumer unit should get you up and running again.

If it keeps recurring then check the specific troubleshooting issues further down the page.

Reset the Easee One

+

It’s a cliché, but it genuinely can work. Sometimes the Easee just needs a kick up the backside and the best way to do this is to reset it.

  1. Locate the dedicated circuit breaker (see photos below). This should be where your installer connected the charger’s cabling to your mains supply.

  2. Switch it off and leave for 10 seconds.

  3. Now switch back on again

Easee One Troubleshooting

The Easee One will not release my charging cable even after I disabled the permanent lock

+

There are two main reasons why this might have happened, these are:

  • You are using a third party cable that might have become stuck in the Easee One's locking mechanism,

  • Someone has tried pulling the cable out of the Easee before the locking mechanism has had time to release it.

Fortunately, Easee builds a manual unlock release procedure into its chargers. To activate manual unlock, you will need to:

  1. Unplug your cable from your EV

  2. Go onto your Easee app and make sure that the lock setting is set to 'unlocked/locked'

  3. Push the charging cable into the Easee

  4. Keep the cable pressed into the Easee and with the other hand hold the touch button on the front for two seconds

  5. Pull the cable out of the Easee

  6. Repeat steps 1 to 5 if it didn't work the first time

The light strip on the Easee One is glowing yellow at the bottom

+

This means that the Easee is waiting to be configured. If this problem has occurred to your unit after the install has been completed then there may be a fault with the Easee itself.

Please go to Easee's support page for further help.

My Easee One isn't charging at the speed I expected

+

If your EV's charge speed is set to its max output (See 'Check the vehicle's onboard charging settings' if you are unsure on how to do this) but you're still experiencing slower charge speeds than expected then please check that your Easee's power settings to make sure it isn't being limited.

To do this, you will need to:

  1. Open the easee app

  2. Tap 'power management'

  3. Three options should appear: automatic, single phase and three phase. Select the aproproate option for your installation (in most cases this will be single phase unless you have opted for a three-phase installation. Choose automatic if you are unsure.)

  4. Exit out of the menu

Your Easee should now start charging at your chosen charging speed.

The problem with my unit is not listed on here or the advice given has not solved my issue

+

If none of the advice above works then you might need to contact Easee. You can do this by visiting the 'user support' page on their website and filling out your details on their contact form.

Easee One Installation and Setup Guidance for installers

Step 1: Check the charger

+

Customers should receive their Easee before installation day. It’s good to check the contents inside the box to make sure there isn’t any damage and to check the correct product has been sent.

Step 2: Download the app

+

Before installation, customers should download the Easee app from the smartphone app store. Click the links below to download the Easee app:

Step 3: Set up the app

+
  1. Open the Easee app

  2. Here you will need to register an Easee account. Follow the on-screen instructions.

  3. Once registered, the app will ask you to confirm a phone number. The customer will receive a text message with a four digit code in it.

  4. Copy and paste the code from the text message into the input box on the confirmation screen of the app.

  5. If successful, the app will show you a welcome screen. Read through the welcome slides to get to the pairing screen.

The Easee charger needs to be installed before you can pair it with the app on the customer's device.

Step 4: Installation and pairing

+

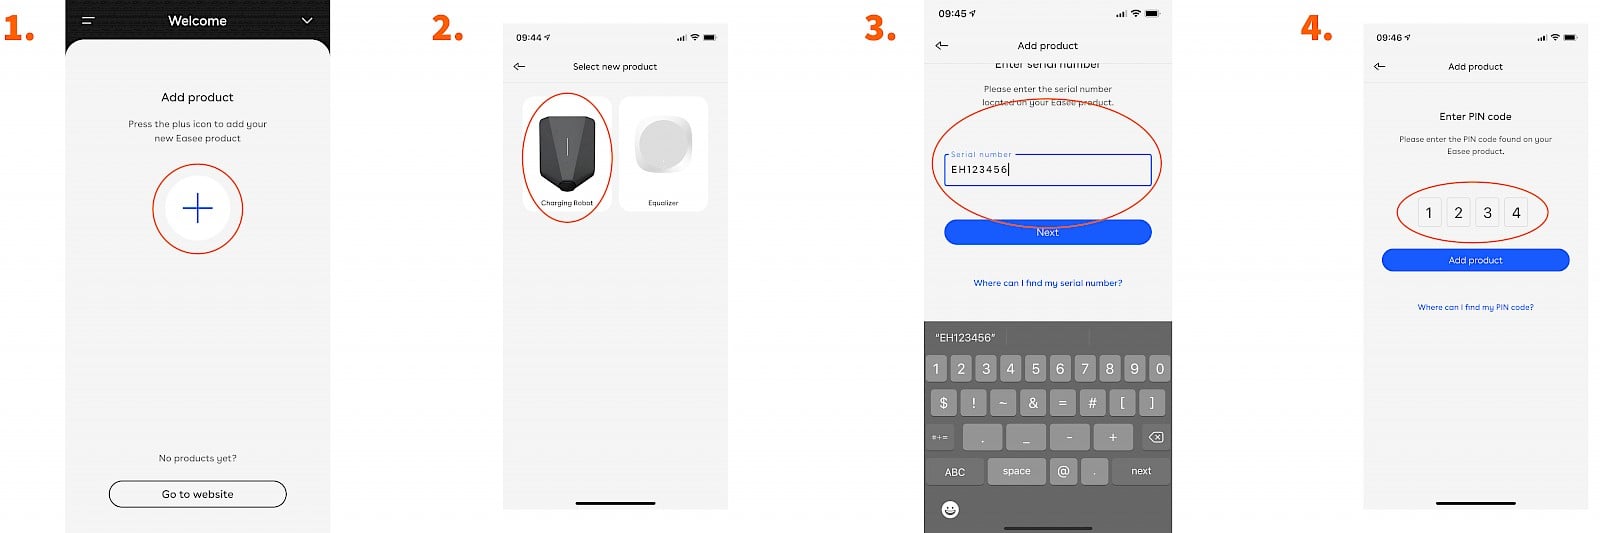
Once the Easee is installed, you will now able to pair the app to the Easee.

  1. On the pairing screen, tap the plus button

  2. Select the charging robot option

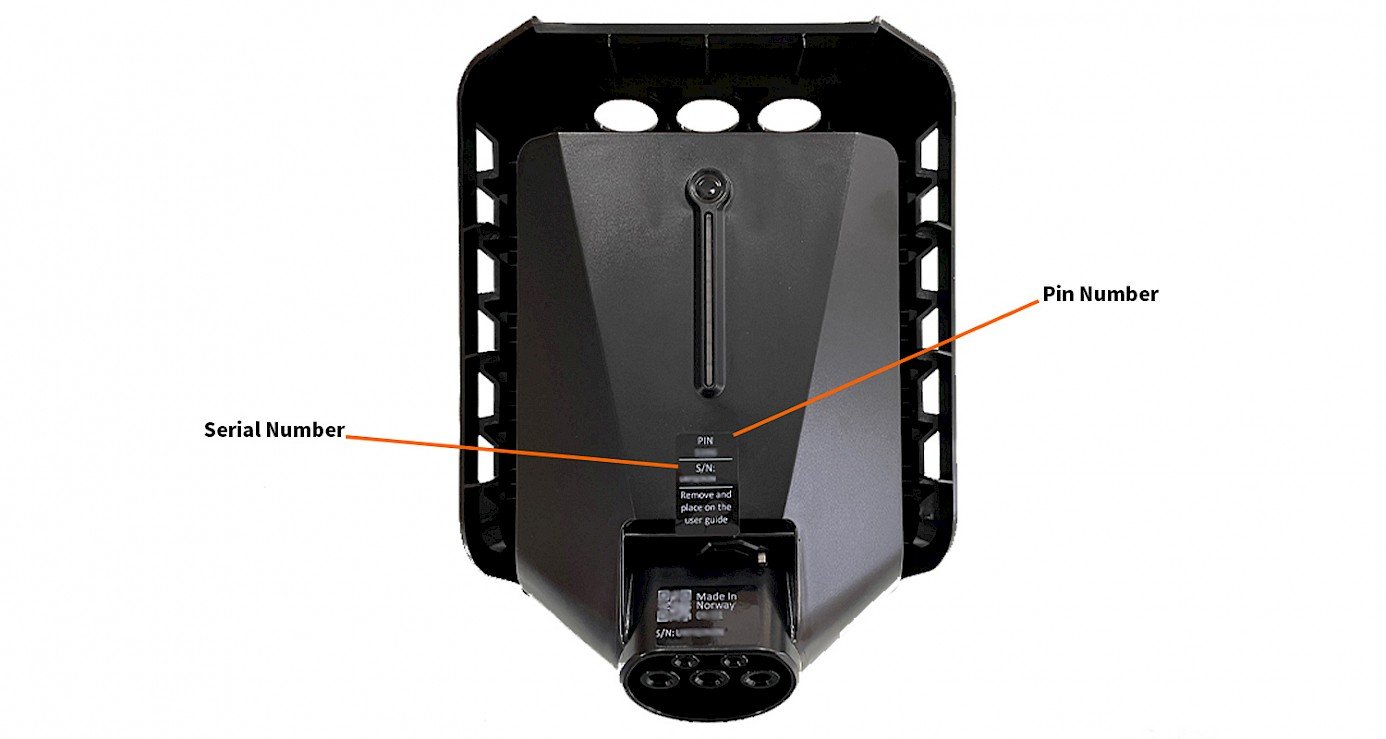
  3. Enter the serial number located on front of the Easee under the faceplate.

  4. Enter the four digit pin code. This can also be found above the serial number.

Step 5: After Pairing

+

After you have followed these steps, your installer should check that your app and Easee are correctly paired.

Easee One charger review

Still researching which EV charger to get? Why not check out our editor's review of the Easee One charger.
Not ready for a home EV charger yet?
Still have questions?

Download our FREE Go Electric guide to home charger installation.

Description Here.
BE THE FIRST TO KNOW
Sign up and instantly get:
  • Your FREE and exclusive interactive Go Electric guide
  • The latest EV charger reviews
  • New car releases and EV news
  • App set-up guides and more electric car charging tips

You can unsubscribe at any time.

You are signing up to receive the Smart Home Charge newsletter. Terms and conditions apply.