Andersen A2 Product Support | Smart Home Charge
Image of Guide

You can unsubscribe at any time.

You are signing up to receive the Smart Home Charge newsletter. Terms and conditions apply.

Not quite ready for an installation yet?

Access our FREE guide to home charger installation.

Sign up and instantly get:
  • Your FREE and exclusive interactive Go Electric guide
  • The latest EV charger reviews
  • New car releases and EV news
  • App set-up guides and more electric car charging tips
Not quite ready for an installation yet?

Access our FREE guide to home charger installation.

Image of Guide
Sign up and instantly get:
  • Your FREE and exclusive interactive Go Electric guide
  • The latest EV charger reviews
  • New car releases and EV news
  • App set-up guides and more electric car charging tips

You can unsubscribe at any time.

You are signing up to receive the Smart Home Charge newsletter. Terms and conditions apply.

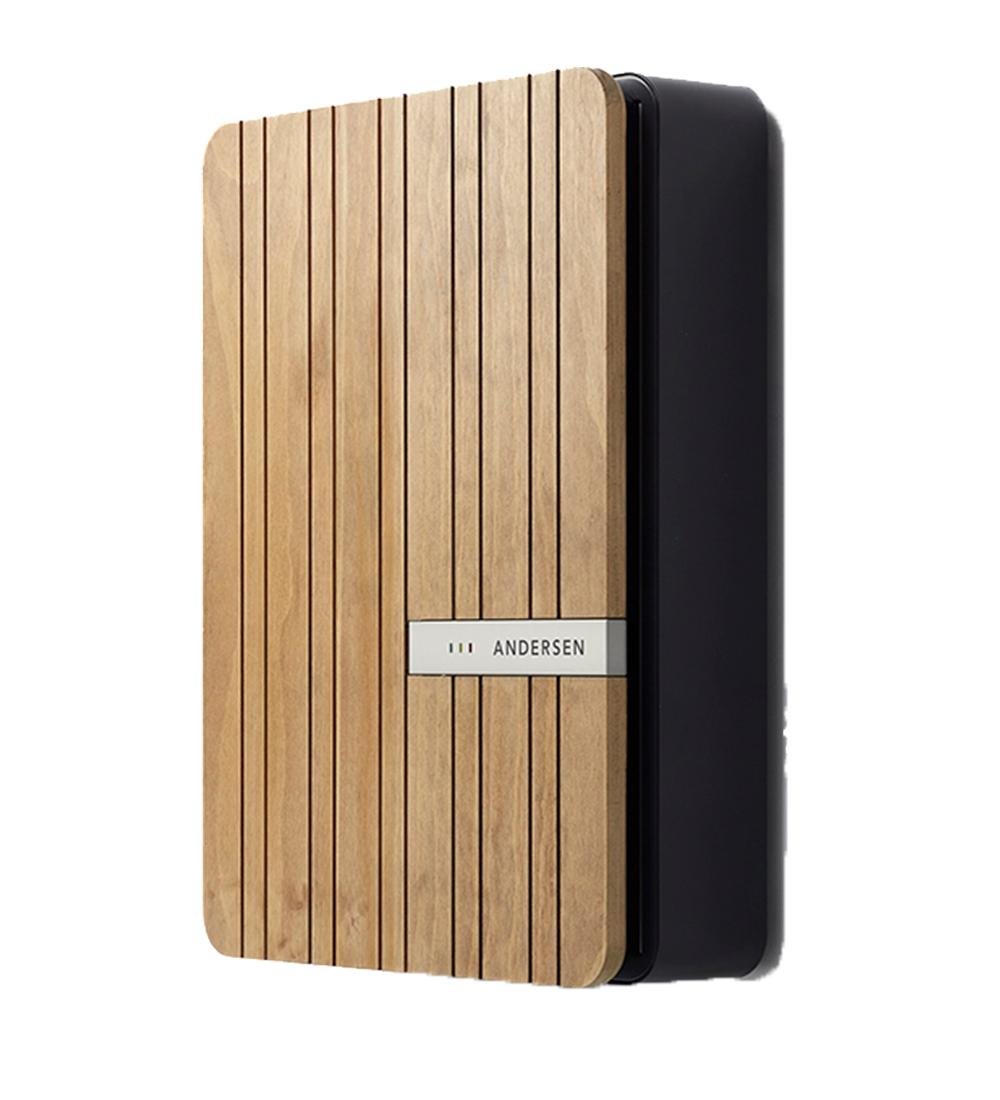
Get to know your Andersen A2

We've created this page to help you understand your home EV charger so you can get the most out of it and deal with any potential hiccups along the way. Get started with these key features for your Andersen home charger

What the LED lights mean on the front

+

On the front of the Andersen EV charger next to the logo on the metal strip, you will see three small LED lights.

These lights will glow various colours to indicate the unit’s status.

Red, amber and green led lights flash together twice a second: Your Andersen is powering up

Green light flashing every eight seconds: Your Andersen has lost connection with your WiFi network.

One solid green light: Your unit is on standby and ready to charge your vehicle

Solid green and solid amber: Your Andersen recognises that you have plugged the charging gun into a vehicle and is waiting for its next command

One solid amber light: This means that your Andersen is currently charging a vehicle.

Solid green and solid red: Your charger is disabled and will be unable to provide a charge until it is enabled again. If you're disconnected from the cloud, the charger will enable itself after five minutes.

Solid green with flashing red: There is a problem with your vehicle and the charger cannot start because of it.

Solid red: There is an electrical fault that is preventing your charger from functioning.

Flashing red: There is an internal fault with your Andersen. If you see this light occurring on your Andersen, try power cycling your unit (Turn it off and on again at the circuit breaker).

Locking your Andersen A2

+

Using the Andersen EV app, you can lock your Andersen EV charger and stop anyone from using it during times when you are not:

  1. Go to the home tab (bottom left icon)

  2. Slide the disable slider to the right.

If done successfully, the slider and circle above it should turn red.

The green bar that says ‘ready’ on it should also change to red and should now say ‘Locked’.

To unlock the charge point, simply slide the same slider mentioned earlier back to the left.

Scheduling a charge

+

To set a charge schedule on your Andersen EV charger, you will need to open the Andersen EV app and:

  1. Tap the schedule tab (the third icon from the left)

  2. Tap ‘add new schedule’

  3. Enter when you want the schedule to start and finish

  4. Select the days that you want to the charge schedule to be applied to.

  5. Tap save when finished

You should see your schedule appear on the home tab within the (now) blue circle.

Need to contact Andersen?

+

If you need to contact Andersen, you can do so by visiting the "contact us" page on their website.

Or call: 0203 8904 510

Charger isn't working? Check these steps first!

Most EV chargers are very reliable and should charge your Electric vehicle (EV) as intended. However, there are lots of variables with EV charging that can occasionally interrupt this process. Make sure you've checked the below before moving on to the advanced troubleshooting steps further down the page, as there could be a simple solution to the problem.

Is the cable plugged in correctly?

+

As part of a safety and security mechanism, Electric cars will often lock a plugged-in cable into place during a charge session in order to prevent forced unplugging.

If the Andersen's cable is not properly inserted into your EV, the locking mechanism in the vehicle's charging port might not lock onto the cable properly and therefore prevent the Andersen from charging your car.

If you think this might have happened to you, we advise that you unplug the cable from your car, plug it back in again and hold it in place until you hear the locking mechanism on your car grab the charging cable.

What charging rate can your vehicle accept?

+

Most EVs can accept a charge rate of up to an AC charge rate of up to 7.4kW using a single phase charger and up to 11kW using a 3-phase charger.

Some older EVs however, such as the first Nissan Leaf, charge at a much slower rate.

This means that no matter what charge rate your Andersen EV charger outputs, your EV will limit the rate to its max output.

You can check your vehicle's charge rate by finding it on the EV page section of our website (it will be listed under charging time).

You should also be able to find your vehicle's max charge rate in its manual.

Check the vehicle's onboard charging settings

+

If you know that your EV can accept the max charge speed outputted by your Andersen A2 but your EV is still charging at a slower rate then the next thing to check is if your EV isn't deliberately limiting the charge rate due to a setting.

Some vehicles have the ability to adjust the charge speed manually which when set will limit the charge rate that your A2 outputs to your vehicle.

We recommend that you check your vehicle's settings to make sure that the limiter is either off or set to the max output of your Andersen A2.

Is your vehicle's settings clashing with your charger app schedule?

+

Some vehicles have built-in scheduling features which can interfere with the Andersen's own charge scheduling.

Every EV is different, so we advise checking the manual that came with your EV if you are unsure how to turn off or modify its charge scheduling.

If you have done the above but are still having issues, please check using the Andersen app that you do not have any conflicting charge schedules.

Has the charger tripped at the consumer unit?

+

It's rare, but an EV charger may trip at the consumer unit if it detects a fault.

This is a safety feature, but simply switching the car charger back on at the consumer unit should get you up and running again.

If it keeps recurring then check the specific troubleshooting issues further down the page.


Hardware reset the Andersen A2

+

It’s a cliché, but it genuinely can work. Sometimes the Andersen A2 just needs a kick up the backside and the best way to do this is to reset it.

  1. Power down the Andersen A2 by switching it off at the mains

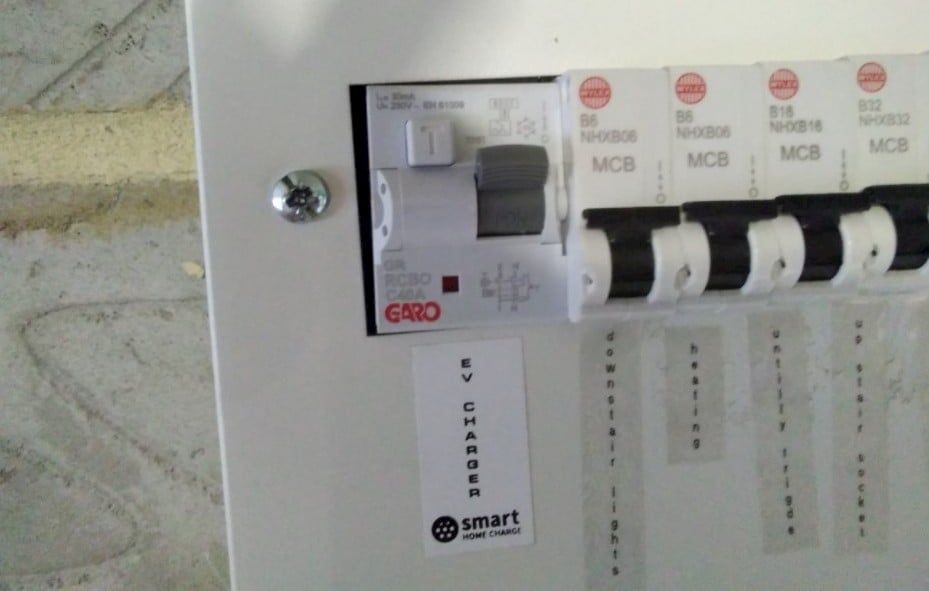
  2. Locate the dedicated circuit breaker (see photos below). This should be where your installer connected the charger’s cabling to your mains supply.

  3. Switch it off and leave for 10 seconds.

  4. Now switch back on again

Network reset

+

This type of reset will erase all of your network configurations so that you can start afresh.

As the name might suggest, this form of resetting is only meant for users who are experiencing connectivity issues such as problems connecting to WiFi.

If you’re experiencing an issue that is not network or connectivity related, go with the hard reset option above. 

To perform a network reset, follow these steps:

  1. Unplug the ethernet cable from the unit (if you are using one).

  2. Press the setup button located at the bottom left between the faceplate and the body of the unit five times.

  3. If done correctly, you should see three lights begin to flash. This means the charger is ready to begin the network reset process. If you didn’t mean to do this, you can still back out by pressing the button again once. If you want to carry on with the reset, press the button five more times to confirm.

Wait 60 seconds for the unit to reboot.

Have you tried this?

+

Most phones nowadays will automatically keep installed apps up to date, but it’s always good practice to make sure that it is.

To do this you’ll first need to go into the app store on the iPhone or the Google Play Store on Android.

Navigate to your installed apps and you should see a list of which apps are up to date and which ones aren’t.

If the Andersen app is showing that there’s an update available then tap “update”.

Andersen A2 Troubleshooting

My Andersen A2 is not charging my vehicle

+

If you have plugged your Andersen A2 into your vehicle but you aren’t getting a charging response then first check your unit to see if any lights are showing.

If no lights are showing then that means the unit is not receiving power and you should check the following:

  1. Go to your consumer unit and check if the fuse that your Andersen is connected to has tripped. If it has, flick it back to the ON position. If it trips again right after flicking it back on or you are finding that it trips again regularly after flicking it back on then please contact Andersen.

  2. If there are still no lights on the unit even after checking that the fuse is on then please contact Andersen.

  3. If lights are showing on your unit but it’s still not charging then check to see if the unit is locked. You can do this by either checking the app that your charger is connected to or by looking at the lights on the unit. If the charger is locked, the green and red lights will stay a solid colour like below.


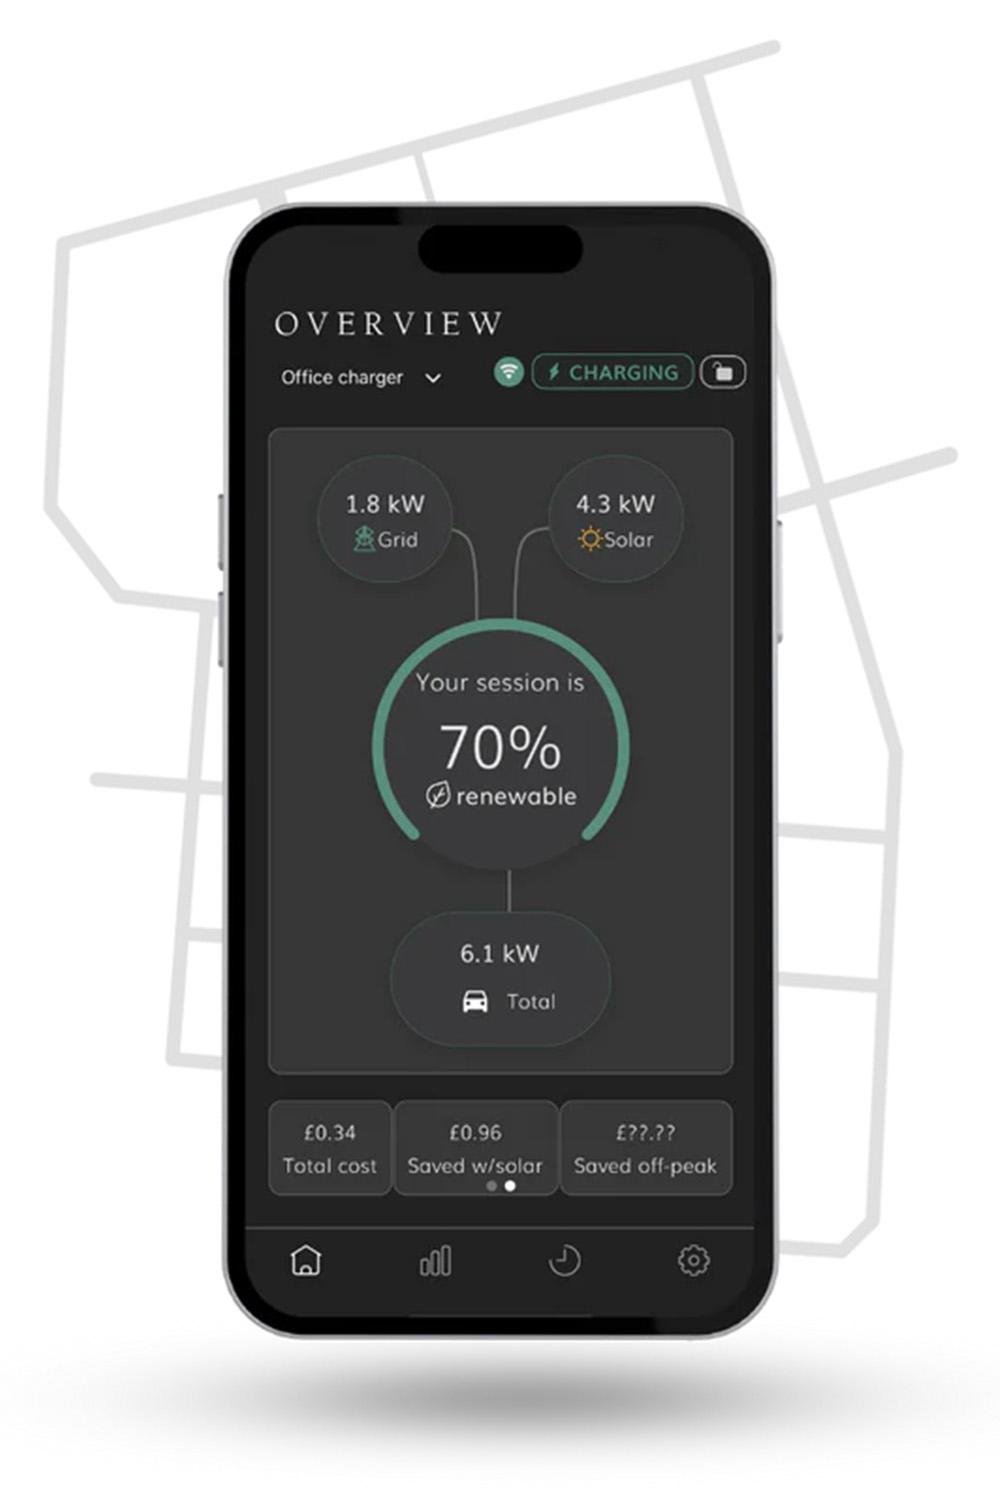
Finally, if none of the above are behind the issue, check the charger status in the app. If the status shows “NO CP” please contact Andersen.

My vehicle is not charging at full power

+

There are a few reasons why this might be occurring with your Andersen A2. Firstly, check to see if your vehicle supports the power output your A2 is charging at (this is either 7.4kW or 22kW if you have opted for a 3-phase installation).

Most modern EVs will accept 7.4kW at the very least but some older electric cars, such as the first Nissan Leaf charge at a lower rate such as 6.6kW or even 3.6kW.

If your vehicle is limited to 6.6kW, for example, then this will be the max rate of charge even though the Andersen is capable of a higher output rate.

Effectively, the car dictates the charging rate.

If your car does support the max output your charger should be providing, but is still charging slowly, please contact Andersen.

My Andersen continuously disconnects from my WiFi network

+

If your WiFi is working for all of your other devices but not your Andersen A2, there could be a number of reasons for this.

Firstly, check the WiFi strength in the area where your charger is.

This is something that we ask you to check before installation but it’s a good idea to check the WiFi strength again if you’re experiencing issues, especially if you have moved your router after installation.

If you are finding the WiFi signal is weak or inconsistent in the area of your charger then the problem could be caused by interruptions to your WiFi signal.

Most WiFi signals transmit using a 2.5ghz signal which is the same signal frequency as a lot of other household appliances such as wireless home telephones and microwaves.

If you have any devices like this near your Andersen then we advise moving them if you can as they can create disruptions to the connection between the charger and your WiFi router.

If you have done the above but you are still finding your Andersen is struggling to maintain a stable signal then you might need to move your router closer to where the charger is located.

If this is not an option then you can also buy a WiFi range extender which could provide your Andersen A2 with the signal strength needed to operate consistently.

The problem with my unit is not listed on here or the advice given has not solved my issue

+

If you are finding that none of the advice on this page is working for you then please visit www.andersen-ev.com/contact-us/ and enter your details as well as the issue you are expiereincing onto the form. Andersen will then contact you via email or telephone.

Or call 01234 916125 for additional assistance

Andersen A2 Installation and Setup Guidance for installers

Step 1: Check the charger

+

Customers should receive their Andersen A2 charger before installation day (if ordered via Smart Home Charge).

It’s good to check the contents inside the box to make sure there isn’t any damage and to check the correct product has been sent.

Step 2: Download the Andersen EV app

+

Before installation, customers should download the Andersen app from the smartphone app store.

Click the links below to download the Andersen EV App:

Step 3: Set up the app

+
  1. Open the app on your smartphone

  2. Sign in

    • If the customer bought the Andersen A2 directly from Andersen then they will already have an account. Sign in with those details.

    • If the customer bought the Andersen A2 and installation from Smart Home Charge, you will need to first register an account for them. Click “Sign up now” and follow the on-screen instructions.

    • Sign in.

  3. To complete the rest of the setup process, the Andersen A2 unit will need to be installed first.

Step 4: Initial setup and pairing

+
  1. Once the Andersen is main powered on (and it has been tested), completion of the app setup can commence. There should be a green standby light on the front of the Andersen.

    • Locate the setup button on the back left of the unit and hold it down for 3-6 seconds. It is now in WiFi pairing mode ready to connect to the Andersen EV app on the customer's phone.

    • Select the “Setting” cog icon on the Andersen app.

    • Select “Add Charge Point”

    • Check and follow the on-screen hints and select Continue.

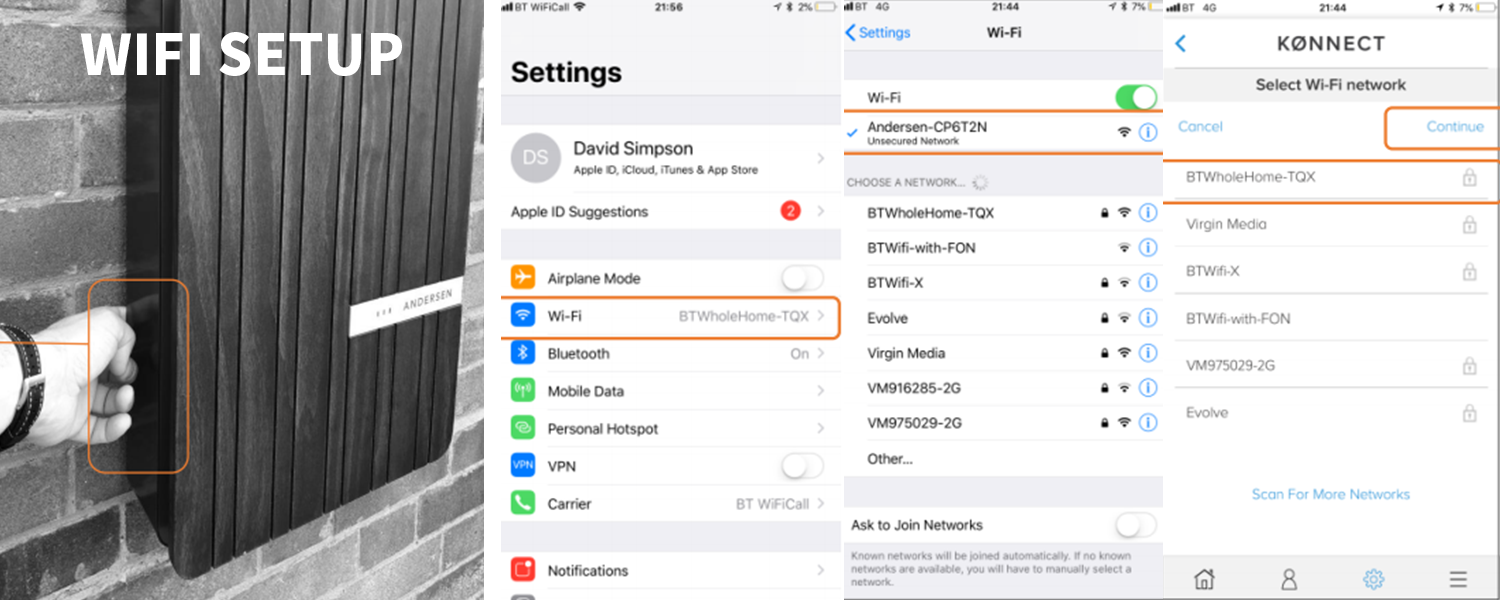
    • Eventually the app will ask you to connect to the Andersen’s WiFi connection.

    • At this point you will need to enter the WiFi menu on the customer's phone’s settings. Exit the app and select WiFi in the mobile phone settings.

    • In the WiFi menu, you should see a network option called “Andersen”. Select this.

    • Once connected you can return to the Andersen app.

    • Select the customer's home WiFi connection and click Continue

    • Enter the WiFi password for the customer's home WiFi.

  2. Once successfully connected the app should ask you to scan the QR code on the Andersen unit. This is located underneath the top lid on your Andersen.

  3. Open the lid and scan the code with the Andersen phone app.

  4. Next, the customer can add a name for their Andersen A2 charge point. Click Continue.

  5. The Andersen A2 and Andersen EV app should now be connected and ready to use.

Not ready for a home EV charger yet?
Still have questions?

Download our FREE Go Electric guide to home charger installation.

Description Here.
BE THE FIRST TO KNOW
Sign up and instantly get:
  • Your FREE and exclusive interactive Go Electric guide
  • The latest EV charger reviews
  • New car releases and EV news
  • App set-up guides and more electric car charging tips

You can unsubscribe at any time.

You are signing up to receive the Smart Home Charge newsletter. Terms and conditions apply.