NexBlue Point 2 Product Support | Smart Home Charge
Image of Guide

You can unsubscribe at any time.

You are signing up to receive the Smart Home Charge newsletter. Terms and conditions apply.

Not quite ready for an installation yet?

Access our FREE guide to home charger installation.

Sign up and instantly get:
  • Your FREE and exclusive interactive Go Electric guide
  • The latest EV charger reviews
  • New car releases and EV news
  • App set-up guides and more electric car charging tips
Not quite ready for an installation yet?

Access our FREE guide to home charger installation.

Image of Guide
Sign up and instantly get:
  • Your FREE and exclusive interactive Go Electric guide
  • The latest EV charger reviews
  • New car releases and EV news
  • App set-up guides and more electric car charging tips

You can unsubscribe at any time.

You are signing up to receive the Smart Home Charge newsletter. Terms and conditions apply.

Get to know your NexBlue Point 2

We've created this page to help you understand your home EV charger so you can get the most out of it and deal with any potential hiccups along the way. Get started with these key features for your NexBlue Point 2 home charger

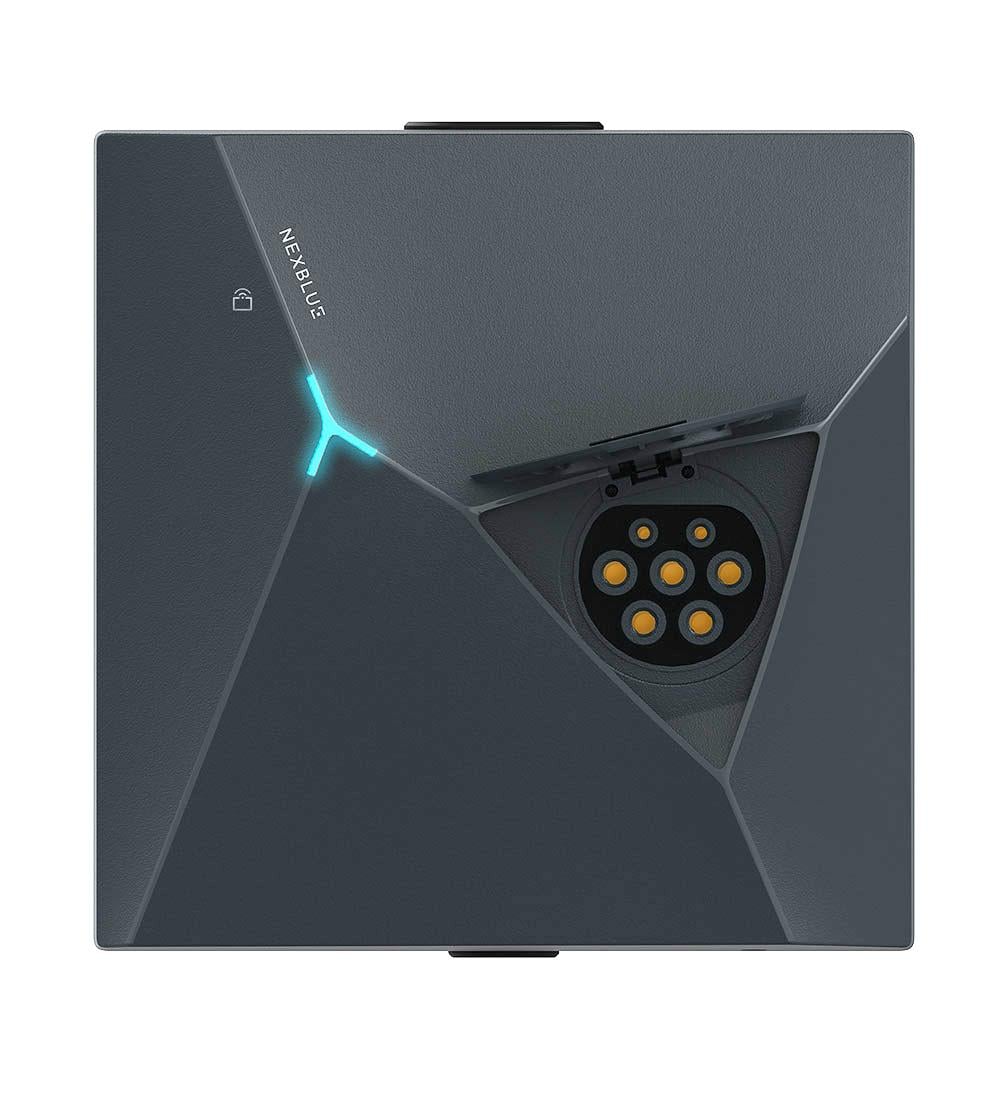
What the LED lights mean on the front?

+

The LED light on the front of your NexBlue charger changes colour and pattern to indicate the unit’s current status.

Breathing orange: Your charger has not been fully commissioned. Contact your installer to complete the setup.

Solid orange: Your charger has been disabled. Contact your installer if you need it to be re-enabled.

Solid blue: The charging cable is connected to your charger and vehicle, but charging has not started. This usually means the charger is waiting for a scheduled charging session.

Breathing blue: Your vehicle is charging successfully.

Solid white: No vehicle is connected and your charger is online and ready to use.

Breathing white: No vehicle is connected and your charger is offline. Check the charger’s internet connection and reconnect it to Wi-Fi using the myNexBlue app.

Solid purple: Your charger is operating in fallback mode because of a communication issue. It may continue to work, but load-balancing features could be unavailable until the connection is restored.

Flashing purple: Your vehicle is charging in fallback mode. Charging will continue, but load-balancing features are temporarily unavailable.

Breathing green: Your charger is installing a firmware update. Do not switch off the power until the update has finished.

Flashing or solid red: Your charger has detected a fault. Contact NexBlue Support so that the issue can be diagnosed.

How to lock a charging cable into the NexBlue Point 2

+

You can leave a charging cable securely locked into the NexBlue Point 2, effectively turning it from a socketed charger into a tethered unit.

Plug the cable firmly into the charger, open the myNexBlue app and select your NexBlue Point 2. Find the cable-locking setting and change it from Lock while charging to Always locked.

The charger will then hold the cable in place, even when it is not connected to a vehicle.

To remove the cable, open the app and press the padlock symbol for a one-time release. Alternatively, change the setting back to Lock while charging. If Always locked remains selected, the cable will automatically lock again the next time it is inserted.

How to schedule a charging session

+

You can schedule your NexBlue Point 2 to charge your vehicle automatically at the times that suit you, such as during cheaper overnight electricity periods.

Open the myNexBlue app, select your charger and tap Schedule on the charger dashboard. Select Create a Schedule, then choose the time you would like charging to start and stop.

You can also set the schedule to repeat on selected days of the week. Once you are happy with the settings, save the schedule to activate it.

Make sure your vehicle is plugged in before the scheduled start time. The charger will wait until the selected time before beginning the charging session.

To remove a schedule, open the Schedule section and swipe left on the schedule you want to delete.

If your charger is offline, move closer to it so that your phone can connect via Bluetooth.

How to set up Smart Charging and opt in to Smart Charge Rewards

+

Smart Charging lets you schedule your charging around your needs while earning rewards for helping to balance the electricity grid, without giving up control.

Open the myNexBlue app and go to the Smart Charging section. Enter your energy tariff details, including your provider, off-peak times and electricity prices, then set your charging requirements; when you need your vehicle ready and how much charge you require.

If NexBlue can't detect your MPAN automatically, you'll find it on your electricity bill. Once you're happy with your settings, opt in to Smart Charge Rewards and select Finish.

Continue plugging in and NexBlue will schedule your charging based on the information provided, always ensuring charging happens within the off peak times, unless the required charging window exceeds the off peak period.

Smart Charging will manage your sessions around the times you've set, typically overnight or during periods of lower demand, and you'll earn rewards automatically.

You can override the schedule at any time if you need to charge immediately.

Customers will receive £10 for signing up, and £5 each month for which they are enrolled.

To withdraw any balance, head to the smart charging section, and tap withdraw underneath.

How to opt out of Smart Charge Rewards

+

If you'd rather not take part in Smart Charge Rewards, you can opt out at any time from within the app.

Open the myNexBlue app, go to the Smart Charging section and select the option to opt out of Smart Charge Rewards.

Your charging schedule will continue to run as normal, but you will no longer be eligible to earn rewards.

If you change your mind later,

How to change the Ethernet/Wi-Fi Connection

+

In the myNexBlue App, navigate to the product you want to reconnect or change the Wi-Fi for, then tap settings.

Go to Network, if there is Ethernet plugged in, select Ethernet/Cellular, if not, select Wi-Fi/Cellular.

The cellular is included to highlight the fact that, if the internet drops out for whatever reason, the inbuilt 4G eSim will kick in.

Once you tap on Wi-Fi, the device

How to use solar to charge your vehicle

+

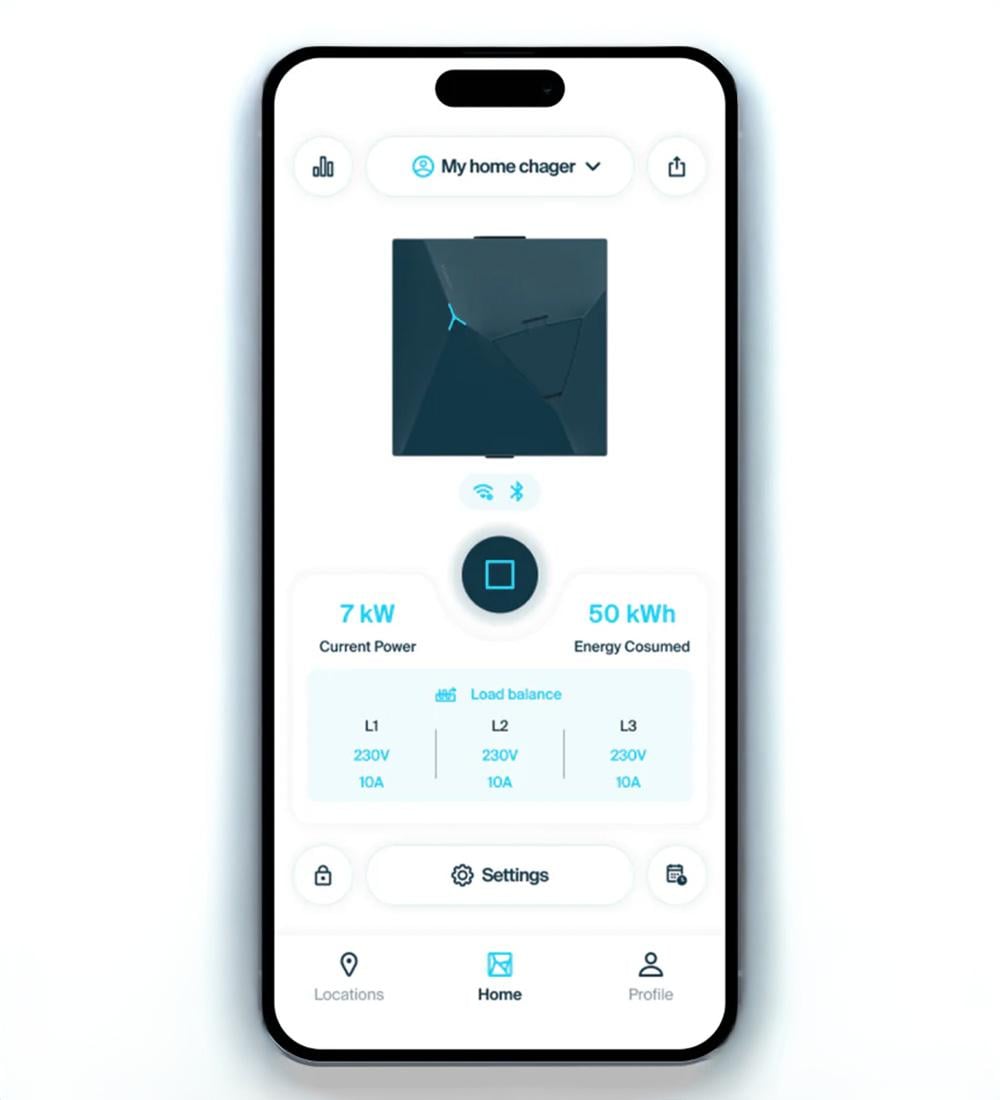
With just one CT clamp, the NexBlue charger can monitor the import and export of energy to your household.

By calculating the current use by the charger, and the amount of energy going in/out of the household, it's possible to determine how much excess energy is being generated by a solar system, after the property has taken what it needs.

We have three settings to help optimise the usage of the solar, all found in the settings section of the Load Balancer in the myNexBlue App.

To navigate to the Load Balancer settings, head to the charger, then tap the charger name at the top of the screen.

A drop down will show, tap the product that has the same Serial Number (SN) as the charger, with "-CT" after it.

Once viewing the CT, tap charging mode to enter the settings.

The three options are as follows:

  1. Dynamic load balance - Maximise the charger speed based on available power to the property, ignoring any solar optimisation
  2. Solar surplus only - Match the charging speed to the amount of energy that would otherwise be exported to the grid. If this value drops below 6A then charging stops.
  3. Solar surplus fi rst - Match the charging speed to the amount of energy that would otherwise be exported to the grid, If this value drops below 6A, top up the remaining requirement with energy from the grid. For example, if the solar were exporting 4A, the charger would charge at 6A, pulling 2 from the grid.

Need to call NexBlue?

+

If you need to contact NexBlue, you can do so by visiting the "contact us" page on their website.

Or call: 020 4572 3701

Charger isn't working? Check these steps first!

Most EV chargers are very reliable and should charge your Electric vehicle (EV) as intended. However, there are lots of variables with EV charging that can occasionally interrupt this process. Make sure you've checked the below before moving on to the advanced troubleshooting steps further down the page, as there could be a simple solution to the problem.

Is the cable plugged in correctly?

+

As part of a safety and security mechanism, Electric cars will often lock a plugged-in cable into place during a charge session in order to prevent forced unplugging.

If your EV cable is not properly inserted into your EV or NexBlue Point 2, the locking mechanism in the vehicle's or charger's charging port might not lock onto the cable properly and therefore prevent the NexBlue from charging your car.

If you think this might have happened to you, we advise that you unplug the cable from your car and charger, plug it back in again and hold it in place until you hear the locking mechanism on your car grab the charging cable.

What charging rate can your vehicle accept?

+

Most EVs can accept a charge rate of up to an AC charge rate of up to 7.4kW using a single phase charger and up to 11kW using a 3-phase charger (although some cars can go as high as 22kW on a three-phase charger).

Some older EVs however, such as the first Nissan Leaf, charge at a much slower rate.

This means that no matter what charge rate your NexBlue EV charger outputs, your EV will limit the rate to its max output.

You can check your vehicle's charge rate by finding it on our vehicle database (it will be listed under charging time).

You should also be able to find your vehicle's max charge rate in its manual.

Check the vehicle's onboard charging settings

+

If you know that your EV can accept the max charge speed outputted by your NexBlue Point 2 but your EV is still charging at a slower rate then the next thing to check is if your EV isn't deliberately limiting the charge rate due to a setting.

Some vehicles have the ability to adjust the charge speed manually which when set will limit the charge rate that your Point 2 outputs to your vehicle.

We recommend that you check your vehicle's settings to make sure that the limiter is either off or set to the max output of your NexBlue Point 2.

Is your vehicle's settings clashing with your charger app schedule?

+

Some vehicles have built-in scheduling features which can interfere with the NexBlue's own charge scheduling.

Every EV is different, so we advise checking the manual that came with your EV if you are unsure how to turn off or modify its charge scheduling.

If you have done the above but are still having issues, please check using the MyNexBlue app that you do not have any conflicting charge schedules.

Has the charger tripped at the consumer unit?

+

It's rare, but an EV charger may trip at the consumer unit if it detects a fault.

This is a safety feature, but simply switching the car charger back on at the consumer unit should get you up and running again.

If it keeps recurring then check the specific troubleshooting issues further down the page.

Hardware reset the NexBlue Point 2

+

It’s a cliché, but it genuinely can work. Sometimes the NexBlue Point 2 just needs a kick up the backside and the best way to do this is to reset it.

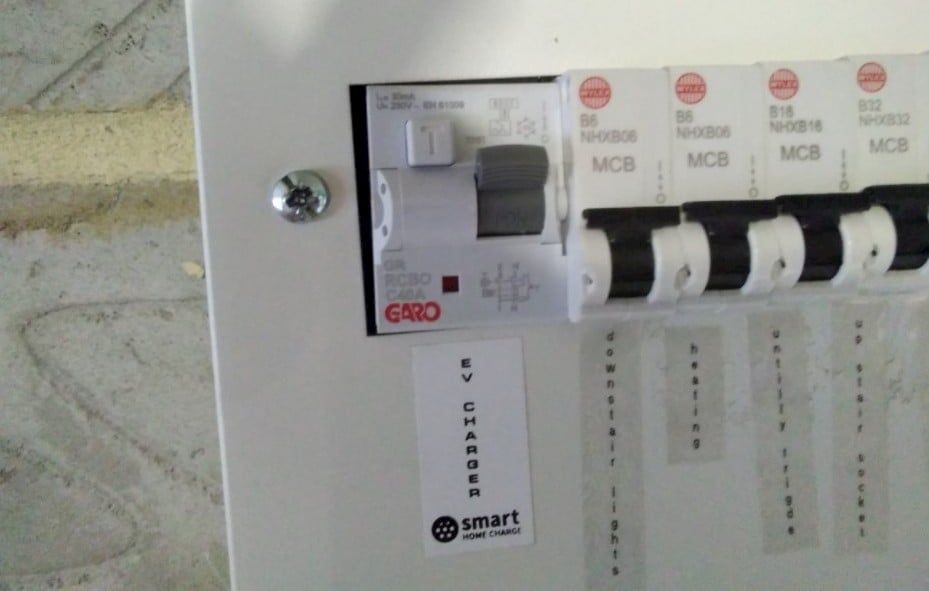
  1. Locate the dedicated circuit breaker (see photos below). This should be where your installer connected the charger’s cabling to your mains supply.

  2. Switch it off and leave for 10 seconds.

  3. Now switch back on again

Have you tried this?

+

Most phones nowadays will automatically keep installed apps up to date, but it’s always good practice to make sure that it is.

To do this you’ll first need to go into the app store on the iPhone or the Google Play Store on Android.

Navigate to your installed apps and you should see a list of which apps are up to date and which ones aren’t.

If the MyNexBlue app is showing that there’s an update available then tap “update”.

NexBlue Point 2 Installation and Setup Guidance for installers

Step 1: Check the charger

+

Customers should receive their NexBlue Point 2 charger before installation day (if ordered via Smart Home Charge).

It’s good to check the contents inside the box to make sure there isn’t any damage and to check the correct product has been sent.

Step 2: Download the MyNexBlue app

+

Before installation, customers should download the MyNexBlue app from the smartphone app store.

Click the links below to download the MyNexBlue App:

Step 3: Set up the app

+
  1. Open the app on your smartphone

  2. Sign in

    • If the customer bought the NexBlue Point 2 directly from NexBlue then they will already have an account. Sign in with those details.

    • If the customer bought the NexBlue Point 2 and installation from Smart Home Charge, you will need to first register an account for them. Click “Sign up now” and follow the on-screen instructions.

    • Sign in.

  3. To complete the rest of the setup process, the NexBlue Point 2 unit will need to be installed first.

Step 4: Initial setup and pairing

+

Once the NexBlue is main powered on (and it has been tested), completion of the app setup can commence. You will need the installer app to continue.

  1. Open the app and tap start configuration
  2. Enter the details of the customer's location
  3. Set the circuit fuse and max charger current.
  4. Scan the QR code on the right side of the charger and fill in the pin code found on the front cover of the manual
  5. Configure the WiFi settings
  6. Tap finish and transfer ownership
  7. Follow the instructions on screen to transfer ownership
BE THE FIRST TO KNOW
Sign up and instantly get:
  • Your FREE and exclusive interactive Go Electric guide
  • The latest EV charger reviews
  • New car releases and EV news
  • App set-up guides and more electric car charging tips

You can unsubscribe at any time.

You are signing up to receive the Smart Home Charge newsletter. Terms and conditions apply.